Come see the difference C&G makes. Offering expert full-service mechanical, maintenance & repair in addition to our top rated collision and paint shop.
Looking for expert auto body and paint services at competitive prices? Our shop specializes in restoring and enhancing your vehicle’s appearance while providing top-notch service, maintenance and repairs. We ensure your car not only looks great but also performs at its best!
Years of Experience
Our skilled technicians provide top-quality paint work, autobody, and general automotive repairs to keep your car looking and running like new. With expert skill and attention to detail, we ensure every job is done right the first time. Trust us for reliable service at a fair price, every time. That’s our guarantee!
Hear from our satisfied customers about our exceptional work, customer care and honest pricing here in Clarksville MD!
Posted on GoogleTrustindex verifies that the original source of the review is Google. The staff were super friendly and supportive. The work was done professionally and completed on time. I would use them again!Posted on GoogleTrustindex verifies that the original source of the review is Google. I brought my car to C&G because it had a mechanical issue. The car broke down at 7:30 PM, and luckily, when I called the shop, they answered right away. They sent a tow truck for me, and the next day, I got the diagnosis. The service was fast and affordable. My technician, Tam, did an excellent job with both the diagnosis and the repair. I had my car back quickly and at a great price. From now on, C&G is my shop! Tam kept me updated with texts and photos, showing me exactly what the problem was and how they fixed it. Super professional all the way. Highly recommend!Posted on GoogleTrustindex verifies that the original source of the review is Google. TLDR: Some initial issues with my repair but top notch customer service. Adrian is great. There were some issues with my rocker panel repair starting with delays ordering the part, and then it turned out to be the wrong part. They assured me could do the repair perfectly without the part, and I said ok hesitantly. When I picked up the car the work was not up to standard. The texture (sort of pebbled) was not uniform across the whole panel (it cut off suddenly), and where it was applied on the repaired panel it did not match the factory panel on the other side of the car. (It was rougher.) Also on that other side there was a dent I did not remember being there before. I will say that when I explained my concerns over the phone they had me bring the car back and redid the repair free of charge, as well as fix the other dent. Overall it was somewhat of a hassle but I was really impressed with the customer service, and the end result seems to be satisfactory.Posted on GoogleTrustindex verifies that the original source of the review is Google. I came to this shop four different ocasión and always left happy and very satisfied, thank you for your hard work C&G Specialty.Posted on GoogleTrustindex verifies that the original source of the review is Google. First experience was a great one! Adrian and Walter were very attentive, polite, and patient. Service was provided on the same day, no appointment necessary (in my experience), and not a long duration of time either. Surely will be returning, when needed.Posted on GoogleTrustindex verifies that the original source of the review is Google. These guys are the best!Posted on GoogleTrustindex verifies that the original source of the review is Google. Always doing fantastic work.Posted on GoogleTrustindex verifies that the original source of the review is Google. This place is awesome! I had an issue with my car recently and they took care of it quickly and professionally. The guys are super friendly. Adrian and Sergio explained everything clearly and helped throughout the entire process. Thank you!
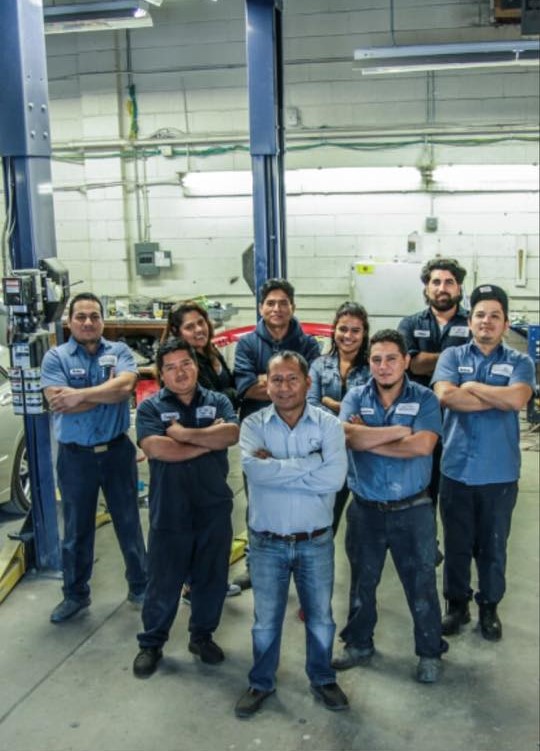
Experience the top-tier work and customer service that makes C&G the very best in Clarksville MD & the DMV.
From flawless auto body work to reliable repairs, we’ll restore your vehicle’s look and performance with expert care in Clarksville MD and surrounding areas!
Come to us for all of your general automotive needs, from trouble-shooting and diagnostics to regular servicing and insurance claims. C&G has you covered!
With a focus on precision paint and autobody work, our shop delivers top-quality repairs to restore your vehicle’s appearance to factory specs.
Specializing in professional auto paint services, our shop ensures a flawless finished product.
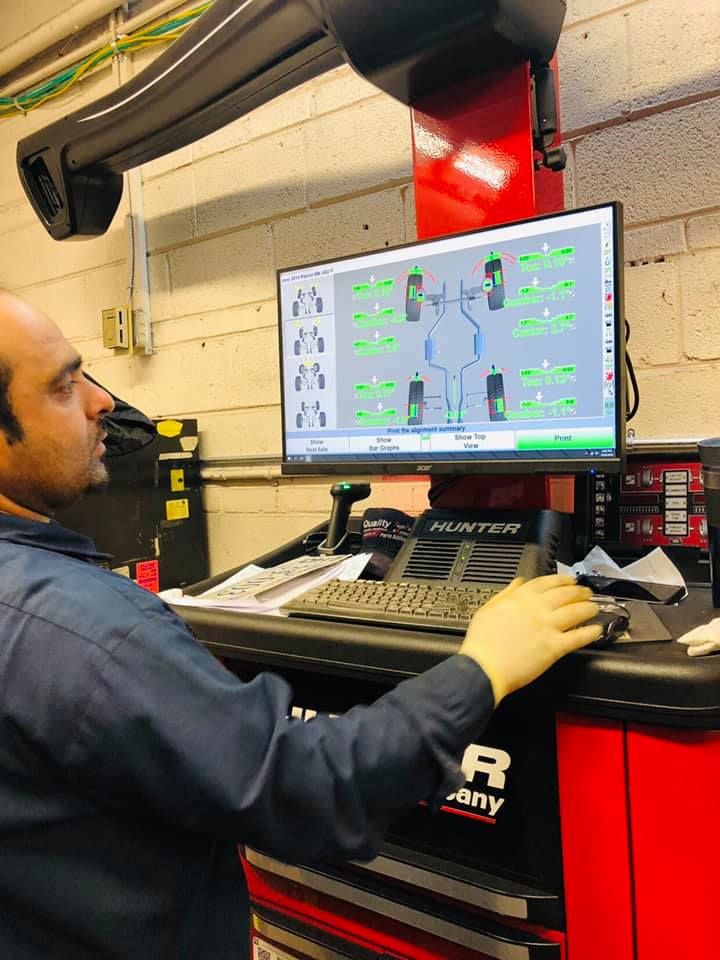
Fully equipped for wheel alignments. We are able to mount, balance & repair tires as well as provide wheel and rim repair.
We also assist with towing and rental car needs and can drop you off at your home or work if you live near by.
Our shop provides fluid servicing and expert transmission replacement to keep you shifting smoothly.
Best prices with top quality fluids and parts for your vehicle.
We prioritize quality and customer satisfaction in every auto body, paint, and repair service we provide in Clarksville MD!
The collision repair process is a systematic approach designed to restore a vehicle to its pre-accident condition. Each step plays a critical role in ensuring the structural integrity, aesthetics, and safety of the vehicle. Below, we’ll break down the seven essential steps involved in this process.
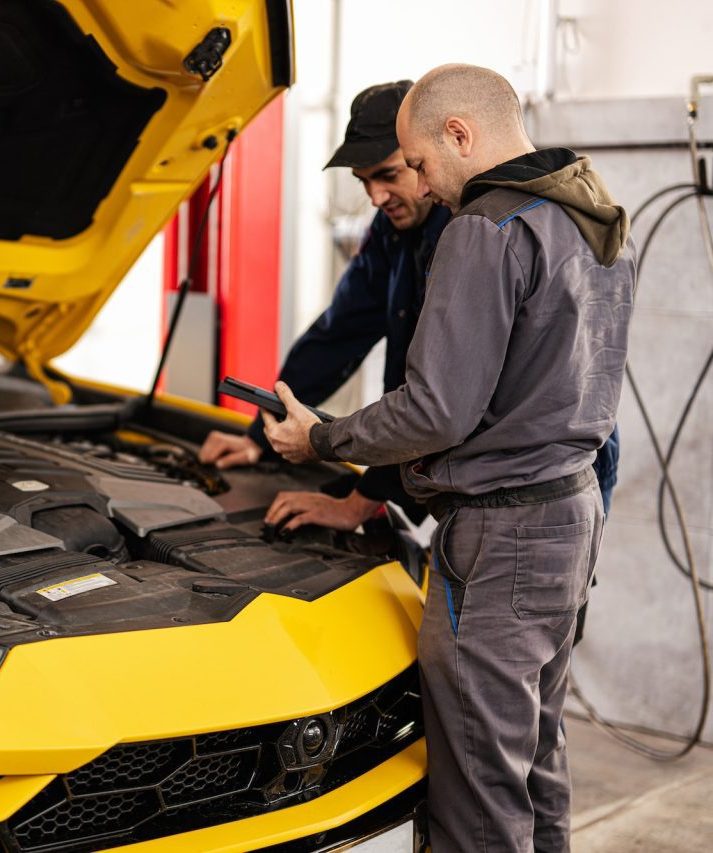
Once a damaged vehicle arrives at the autobody repair shop, professionals begin with an inspection to assess the severity of damage. This step typically involves:
– Visual Inspection: Examining visible damage to surfaces such as bumpers, hoods, doors, and panels.
– Diagnostic Scanning: Using modern tools to identify internal or hidden issues not visible to the naked eye (e.g., electrical system faults).
– Estimate Preparation: Creating a repair estimate for labor, parts replacement, and any additional services required.
The damage assessment ensures that all necessary repairs are documented before work begins.
After completing an initial assessment, disassembly is performed to reveal hidden damage and confirm preliminary findings. During this phase:
– Components like bumpers, fenders, lights, or panels may be removed. – Internal structures such as frames or reinforcements are checked for alignment issues. – Adjustments can be made if additional unexpected damage is discovered.
Disassembly allows technicians to create a more accurate plan for repairs while ensuring no critical areas are overlooked.
Structural integrity directly impacts vehicle safety. If frame or chassis components are compromised during an accident, technicians use specialized tools like frame straightening machines or computerized measuring systems to restore alignment. Steps include: – Straightening bent frames using hydraulic equipment. – Rewelding broken sections where necessary. – Verifying structural accuracy through laser-based measurements.
Proper alignment ensures that the repaired vehicle adheres to manufacturer specifications.
With structural repairs completed, attention shifts to exterior components such as panels and doors. Tasks typically involve: – Dent removal using suction devices or hammering techniques. – Panel replacement if parts are severely damaged beyond repair. – Sanding surfaces to smooth out imperfections before paint application.
Skilled technicians work meticulously during this stage for precision in shape and fitment.
Paintwork is critical not just for aesthetics but also for protecting metal components from corrosion over time. Key steps include: 1. Cleaning surfaces thoroughly to remove dirt or debris. 2. Masking off areas like windows or moldings that do not require painting. 3. Applying primers followed by color-matched paint layers specific to the vehicle’s factory finish. 4. Sealing with a clear coat for durability and gloss appearance.
The use of advanced spray booths ensures even application while minimizing environmental contamination.
Once paintwork is complete and cured properly (usually via heat treatments), reassembly begins. This includes reinstalling removed components like lights, mirrors, bumpers, trims, etc., while ensuring proper alignment between parts. Fasteners are double-checked for tightness during this stage.
Reassembly requires precision because even minor misalignments can affect overall functionality or appearance.
Before returning the vehicle to its owner, quality control inspections ensure all repairs meet industry standards for safety and aesthetics: – Technicians recheck alignment specs against manufacturer guidelines. – Operational tests (e.g., headlights/wipers) confirm functionality of electrical systems. – Final polish removes any smudges or dust from painted surfaces.
By addressing every detail during inspection, autobody professionals ensure customer satisfaction with safe and visually appealing results.
| Step | Key Actions |
| Damage Assessment | Visual checks & diagnostic scans |
| Disassembly | Removing key parts; uncovering hidden damages |
| Structural Repairs | Frame straightening; welding |
| Body Work | Dent removal; surface preparation |
| Paint Prep & Application | Priming; color-matching; clear-coating |
| Reassembly | Reinstalling parts with precision |
| Quality Control | Final alignment checks; polishing |
Understanding each of these steps highlights why professional collision repair is more than just cosmetic—it’s about restoring both form and function effectively.
Paint preparation is one of the most critical stages in autobody repair. Ensuring proper preparation is not only essential for achieving professional and long-lasting results but also for maintaining the integrity of the vehicle’s surface. Below, we’ll break down the key steps involved in paint preparation, highlighting why each step is significant.
The first step involves thoroughly cleaning the vehicle’s surface to remove dirt, grease, and contaminants that can interfere with paint adhesion. This cleaning process typically includes:
– Washing the surface with automotive-approved cleaners.
– Using degreasers to eliminate oil and wax residues.
After cleaning, technicians inspect the surface for damage such as scratches, dents, or rust spots that need addressing before moving forward.
Sanding ensures a smooth and even surface for paint application by removing imperfections and old paint layers. Depending on the condition of the existing paint:
– Coarse-grit sandpaper may be used to strip off damaged layers.
– Fine-grit sandpaper smooths out remaining surfaces without creating deep scratches.
Proper sanding helps achieve a uniform texture that enhances primer adhesion.
Damaged areas like dents or chips are addressed using body filler materials:
– Body filler is applied to depressions or uneven sections of the panel.
– Once cured, fillers are carefully sanded to blend seamlessly into the surrounding area.
This step ensures that any flaws are corrected before proceeding with priming.
To protect parts of the car that don’t require painting (e.g., trim pieces, windows), masking tape and sheets are applied securely around these sections. Proper masking minimizes overspray and maintains clean lines during painting.
| Masked Parts | Purpose |
| Window glass | Protects from overspray damage |
| Rubber seals/trim | Prevents contact with paint |
| Headlights/taillights | Maintains clarity without unwanted paint |
Primer serves as a base coat that promotes strong adhesion between bare metal/repairs and subsequent layers of paint while providing corrosion resistance:
– It’s sprayed evenly across all prepped surfaces in thin coats. – Once dried, primer may be lightly sanded again to perfect its finish for a smooth topcoat application.
Before applying color coats, technicians use tack cloths—special sticky cloths designed to pick up fine dust particles—to ensure no contaminants remain on primed surfaces.
Investing time into meticulous preparation yields several benefits:
1. Durability – Reduces risks like peeling or chipping post-repair by ensuring strong adhesion. 2. Professional Finish – Results in an even color application free from blemishes. 3. Corrosion Protection – Addresses rust-prone areas early during repair work. 4. Cost-Efficiency – Avoids costly rework by eliminating issues prior to painting.
By following these detailed steps, experts can ensure high-quality results while meeting industry standards for autobody repair services—a process where every detail matters greatly toward customer satisfaction and vehicle longevity.
Quality control inspection is a critical component of any professional autobody repair process. It ensures that the work performed meets industry standards and guarantees customer satisfaction. By thoroughly examining all aspects of the repair, a shop can identify and address potential issues before returning the vehicle to the owner. Below, we break down the importance of quality control inspections and how they enhance the overall repair experience.
| Inspection Area | Items to Check | Status |
| Structural Repairs | Frame alignment, weld quality | ✅ / ❌ |
| Paint | Color match, texture, finish | ✅ / ❌ |
| Panel Alignment | Gaps, flush fitting | ✅ / ❌ |
| Mechanical Systems | Brakes, suspension, steering | ✅ / ❌ |
| Interior | Cleanliness, functionality of electronics | ✅ / ❌ |
| Road Test | Handling, noise, performance | ✅ / ❌ |
By implementing a rigorous quality control process, autobody repair professionals can ensure that vehicles are repaired to the highest standards, leaving customers satisfied and confident in the safety and appearance of their vehicles.
Disassembly is a critical phase in the collision repair process. It is not simply about taking the damaged vehicle apart; it involves methodically dismantling components to assess the full extent of damage and prepare for effective repair. This stage ensures that no hidden issues go unnoticed, setting the foundation for a seamless restoration.
| Tool Name | Purpose |
| Plastic Pry Tools | Prevention of scratches when removing trims |
| Socket Wrenches | Loosening nuts and bolts |
| Trim Clip Removers | Safe removal of interior clips |
| Panel Removal Kits | Detaching body panels without causing dents |
By prioritizing meticulous disassembly practices, autobody shops not only speed up subsequent repairs but also ensure long-lasting results that meet industry safety standards.
Reassembly is a critical step in the autobody repair process that often determines the overall quality and functionality of the repaired vehicle. After the repair work has been completed and components have been refinished or replaced, the reassembly phase ensures that everything is put back together seamlessly. Proper reassembly not only impacts the vehicle’s appearance but also its structural integrity and safety. Below is a detailed overview of how expert reassembly is performed and its significance in achieving exceptional repair results.
| Tool/Technology | Purpose |
| Torque Wrenches | Ensures bolts and fasteners are tightened to the correct specifications. |
| Digital Alignment Tools | Verifies proper alignment of panels and other components. |
| Diagnostic Scanners | Tests and calibrates electrical and safety systems. |
| OEM (Original Equipment Manufacturer) Parts | Maintains consistency and reliability with factory specifications. |
Reassembly is a meticulous process that requires skill, attention to detail, and the right tools. By ensuring that every component is installed correctly, professional autobody technicians play a significant role in delivering a vehicle that not only looks great but also performs reliably and safely. Understanding the expertise involved in this phase highlights its essential role in collision repair services.