Paint Prep: Surface Preparation for Perfect Results
Why Proper Surface Preparation Is Essential
Achieving a flawless and long-lasting paint finish requires more than just choosing the right paint. Surface preparation is the foundation of any successful painting project, ensuring that the paint adheres properly, looks professional, and stands the test of time. Neglecting this critical first step often leads to peeling, uneven finishes, or premature wear. Below, we explore why surface preparation is not only essential but also a worthwhile investment of your time and effort.
The Role of Surface Preparation
Surface preparation creates a clean, smooth, and stable base for paint application. Whether you’re painting walls, furniture, or metal surfaces, proper prep allows the paint to bond seamlessly while enhancing its durability. Improper preparation can result in:
– Blistering or bubbling: Caused by trapped moisture or dirt under the paint layer.
– Chipping or flaking: When the surface fails to hold onto the paint due to grease or an unstable substrate.
– Discoloration: Stains and imperfections showing through layers of fresh paint.
Benefits of Proper Preparation
- Improved Adhesion: Clean and primed surfaces allow paint to adhere more effectively, reducing the risk of cracking or peeling.
- Enhanced Aesthetic Results: Smooth surfaces ensure an even application free from visible blemishes like brush marks or rough patches.
- Increased Longevity: Prepped surfaces resist environmental stresses like humidity and temperature changes better than untreated ones.
- Efficient Application: Proper prep reduces chances of needing multiple coats or touch-ups later on.
Prep Problem | Resulting Issue | Solution |
Dirty surface | Poor adhesion | Clean thoroughly with degreasers |
Uneven texture | Visible flaws | Sand until smooth |
Moisture | Paint bubbling | Allow proper drying time |
Scenarios That Demand Extra Attention
Certain projects require heightened focus on surface prep due to unique challenges posed by materials: – Metal Surfaces: Rust must be removed completely with wire brushes or sandpaper before applying primer. – Wood Surfaces: Gaps, cracks, and knots should be filled with wood filler for a seamless finish. – Previously Painted Areas: Existing flaking paint must be scraped off entirely before new coats are applied.
Making Prep Part of Your Workflow
It’s helpful to think about surface preparation as part of your entire painting process rather than an isolated task: 1. Start by assessing the condition of your substrate (e.g., is it cracked? Stained? Uneven?).
2. Follow a sequential approach—clean first, sand next if needed, repair imperfections afterward—ensuring no step is skipped. 3. Allocate enough time for prep so you’re not rushing through critical steps like drying after cleaning or waiting between primer applications.
For professional results that last over time—and save you extra repairs down the line—proper surface preparation isn’t optional; it’s indispensable.
Why Cleaning and Degreasing Matter
- Improved Adhesion: A clean surface allows primer or paint to bond more effectively.
- Smooth Finish: Removing debris ensures there are no bumps or imperfections once the paint dries.
- Durability: Paint applied to an oil-free, clean surface is less likely to peel or chip over time.
Steps for Cleaning the Surface
- Use a soft brush or microfiber cloth to remove dust and loose debris.
- For larger surfaces, consider using a vacuum with a brush attachment.
- Use warm water mixed with mild soap or detergent for general cleaning.
- Apply the solution using a sponge or non-abrasive scrubber.
- Rinse thoroughly with clean water to avoid leaving soap residue.
- For greasy areas, use a degreaser formulated for painting prep (e.g., trisodium phosphate – TSP).
- Make sure to follow the manufacturer’s instructions when using chemical cleaners.
- Rinse well after degreasing to ensure no chemicals remain on the surface.
- Allow surfaces to air dry fully or use clean towels for quicker drying.
- Ensure there’s no trapped moisture before proceeding to sanding or priming.
Tips for Effective Degreasing
- Wear gloves when using strong degreasers to protect your skin.
- Test cleaning products on an inconspicuous area first if you’re working with delicate materials.
- Avoid oversaturating porous surfaces such as wood since excess moisture can cause swelling.
Common Tools Required
Tool/Material | Purpose |
Microfiber cloths | Dust removal |
Bucket of warm soapy water | General cleaning |
Degreaser (TSP) | Removing grease |
Sponge or soft-bristle brush | Deep scrubbing |
Towels | Drying surfaces |
Areas Often Missed During Cleaning
When cleaning surfaces for painting prep, some areas are easily overlooked: – Edges and corners: Dirt tends to accumulate in these spots but can be easily missed during quick cleaning sessions. – Hardware like hinges and handles: These should be removed if possible; otherwise, clean carefully around them. – Undersides of furniture (if applicable): Even these areas should be prepped if they will also receive paint.
What Happens If You Skip This Step?
Skipping proper cleaning can lead to numerous problems: – Paint may bubble or blister due to poor adhesion. – The final finish might appear uneven because contaminants interfere with smooth application. – Over time, dirt beneath layers of paint can cause peeling.
By dedicating time and effort into thoroughly cleaning and degreasing your project surface, you set yourself up for painting success. This step lays a solid foundation that ensures your hard work results in superior outcomes—both aesthetically pleasing and long-lasting.
Sanding Techniques for a Smooth Finish
Sanding is a critical step in surface preparation that ensures the paint adheres evenly and results in a smooth, professional-looking finish. Without proper sanding, imperfections like bumps, grain texture, or previous paint layers may show through the final coat. Below is a detailed guide to mastering sanding techniques for your painting project.
Why Sanding Matters
Sanding serves several purposes in paint preparation:
– Smooths out rough surfaces: Whether you’re working with wood, metal, or drywall, sanding helps eliminate irregularities.
– Improves adhesion: A slightly abrasive surface allows primer and paint to bond better.
– Removes old finishes: It gets rid of peeling paint or varnish that can interfere with the new coat.
Tools and Materials Needed for Sanding
Selecting the right tools and materials can make all the difference in achieving a smooth finish. Here’s what you’ll need:
– Sandpaper options: – Coarse grit (40–80): For removing old finishes or smoothing out large imperfections. – Medium grit (120–180): Ideal for general smoothing before priming. – Fine grit (220–320): For finishing touches before applying primer or between coats of paint. – Sanding blocks: Provide even pressure while sanding manually. – Orbital sander: Best for larger surfaces to save time and energy. – Dust mask and safety goggles: Protects against inhalation of dust particles during sanding.
Proper Sanding Techniques
- Identify areas with visible imperfections such as scratches, dents, or uneven textures.
- Determine if an old layer of paint needs to be removed completely.
- Use coarse sandpaper first if you’re dealing with heavy imperfections or peeling paint.
- Apply light-to-moderate pressure in circular motions to avoid over-sanding.
- Once the major imperfections are leveled out, switch to medium-grit sandpaper.
- Finish off with fine-grit sandpaper for a smooth texture ready for primer application.
- For wooden surfaces especially, always sand along the grain rather than against it to prevent scratches and damage.
- Avoid pressing too hard; let the sandpaper do most of the work to maintain consistent results across the surface.
- Frequently wipe down dust using a tack cloth or vacuum attachment to prevent buildup that could scratch the surface.
Key Considerations When Sanding
Here are additional tips and precautions to keep in mind during this process: – Always test on a small area first to ensure you’re using appropriate grit paper without damaging delicate surfaces. – For corners or intricate details, use hand-sanding tools like contour sanding grips rather than power tools. – Avoid over-sanding thin materials like veneer since it may wear through entirely.
Common Mistakes to Avoid
Steering clear of these mistakes will save time and improve your project outcome: | Mistake | Why It’s Problematic | How To Avoid | |—————————–|—————————————–|———————————-| | Skipping coarse grits | Leaves deep imperfections behind | Always start with appropriate grit level | | Over-sanding one spot | Creates uneven low spots | Consistently move across entire surface | | Ignoring dust cleanup | Reduces primer/paint adhesion | Clean regularly using tack cloth |
With these techniques mastered, your surface will be primed—both figuratively and literally—for flawless painting results that stand out professionally without unnecessary challenges later on.
Repairing Imperfections Before Painting
One of the most critical aspects of paint preparation is repairing surface imperfections. Neglecting this step can result in uneven finishes, poor adhesion, and a lackluster end result. A properly repaired surface not only enhances the aesthetic appeal of the paint but also increases its durability and longevity. Below is a comprehensive guide to identifying, repairing, and prepping imperfections before you begin painting.
Identifying Surface Imperfections
Before addressing repairs, carefully inspect the surface to identify areas requiring attention. Common imperfections include:
– Cracks: Often found on walls or wood surfaces due to wear or structural shifts.
– Holes: From nails, screws, or accidental damage.
– Scratches or Abrasions: Particularly common on furniture or high-touch areas.
– Dents or Dings: Frequently found in drywall or other softer materials.
– Peeling Paint: Indicates poor adhesion from previous layers or moisture issues beneath the surface.
Use adequate lighting to reveal flaws that might otherwise go unnoticed, especially for smaller imperfections like hairline cracks.
Tools and Materials Needed for Repair
Tools | Materials |
Putty knife | Spackling paste |
Sandpaper/sanding block | Wood filler |
Utility knife | Joint compound |
Caulking gun | Flexible caulk (for cracks) |
Tack cloth | Fiberglass mesh tape (for larger cracks) |
Step-by-Step Process for Repairs
- Clean the Surface: Start by removing dust, dirt, grease, or peeling paint near damaged areas using a damp cloth or vacuum with a brush attachment. A clean surface ensures better adhesion for fillers and compounds.
- For small holes: Apply spackling paste using a putty knife in smooth strokes.
- For larger holes: Use fiberglass mesh tape to cover the hole first, then apply joint compound over it in thin layers.
- For wood surfaces: Opt for wood filler instead of spackle to maintain compatibility with the material.
- Scrape off loose paint using a scraper tool.
- If peeling covers a large area, sand down edges until they’re smooth with surrounding layers.
- Apply an appropriate filler (wood filler for wooden surfaces; joint compound for drywall).
- Use even pressure during application to avoid leaving ridges around repaired zones.
- For gaps along seams (e.g., between baseboards and walls), use flexible caulk.
- Smooth out caulk with your finger while it’s wet for clean results.
- Allow Sufficient Drying Time: Always refer to product instructions regarding drying times before proceeding with sanding or priming.
- Sand Repaired Areas: Once fillers are dry, use fine-grit sandpaper (e.g., 220-grit) to level out repaired sections until they blend seamlessly into the rest of the surface.
Tips for Best Results
- Always work in a well-lit area so you can accurately assess your repairs.
- Avoid overfilling holes or cracks; multiple thin layers are easier to control than trying to fix everything at once.
- Keep tools clean during use—dried residue on knives can lead to uneven applications.
- Test fillers on an inconspicuous spot if unsure about compatibility with your surface type.
Repairing imperfections might seem tedious but skipping this step compromises both aesthetics and performance of your finished project. Taking time now ensures flawless results that stand up over time—creating not just beauty but also value in your painted surfaces.
Priming the Surface for Better Adhesion
When it comes to achieving a flawless paint job, priming the surface is an essential step that should not be overlooked. Primers serve as the foundation for paint, enabling it to adhere better and last longer. Skipping this step can lead to uneven finishes, poor adhesion, and premature peeling or cracking. Here’s a comprehensive guide on priming surfaces effectively.
Why Priming Matters
Primers act as a preparatory layer that ensures: – Improved Paint Adhesion: It provides a stable surface for paint to stick to, particularly on porous or smooth materials. – Uniform Color: A primer can mask stains and prevent the underlying surface color from bleeding through. – Enhanced Durability: It helps resist chipping, peeling, and damage caused by moisture or environmental factors. – Cost Efficiency: By reducing the number of topcoats needed, primers save time and money.
Choosing the Right Primer
Surface Type | Recommended Primer Type |
Drywall | Latex or water-based primer |
Wood (bare) | Oil-based primer (seals knots) |
Metal | Rust-inhibiting primer |
Glossy Surfaces | Bonding primer |
Stained Surfaces | Stain-blocking primer |
How to Apply Primer Properly
- Use high-quality brushes or rollers suitable for your chosen primer.
- For large areas or intricate surfaces, consider using a sprayer.
2
Final Checks Before Applying Paint
Before you start painting, taking the time to perform final checks ensures the surface is fully prepared and ready for a flawless finish. Skipping this step can lead to imperfections, uneven coverage, or poor adhesion. This section outlines the crucial tasks you should complete before applying paint.
Inspect the Surface Closely
Carefully examine the surface under good lighting conditions to ensure every detail has been addressed:
– Check for dirt or debris: Even after cleaning earlier in the process, dust or particles may have settled on the surface. Wipe with a tack cloth to remove any remaining residues.
– Look for imperfections: Small cracks, dents, or holes can become more visible after painting. Run your hand over the surface to feel for rough patches that might still need repair or sanding.
Ensure Complete Dryness
Moisture left on the surface can lead to bubbling paint or uneven results. Make sure that:
– Any recently cleaned surfaces are fully dry.
– Primers and other preparatory coats have been cured completely according to manufacturer instructions.
Gather Your Tools and Supplies
Having all necessary materials ready reduces interruptions during painting:
– Brushes, rollers, and spraying equipment (as applicable).
– Paint trays and stir sticks.
– Drop cloths and painter’s tape for protecting nearby areas. – Proper personal protective gear (like gloves and masks) if required.
Tool/Material | Purpose |
Tack cloth | Removes fine dust/dirt |
Drop cloths | Protects floors/surrounding areas |
Painter’s tape | Creates clean edges |
Test Adhesion (Optional but Recommended)
Performing a small adhesion test ensures that your priming and preparation steps were effective:
1. Apply a small amount of paint to an inconspicuous area of the surface. 2. Allow it to dry as per paint instructions. 3. Check whether it adheres well without peeling or lifting.
If any issues arise, revisit prior preparation steps such as sanding or priming until optimal adhesion is achieved.
Verify Ventilation
Proper ventilation is critical during painting:
– Confirm windows or vents are open if working indoors. – Use fans if necessary to aid airflow without disturbing settled dust on your prepped surface.
Double Check Protective Measures
Ensure all areas not meant to be painted are adequately protected: – Walls, trim, floors, light fixtures, and hardware should be covered with painter’s tape or drop cloths. – Re-secure loose coverings before starting if needed.
By diligently performing these final checks before applying paint, you create ideal conditions for achieving smooth coverage and professional-looking results that stand the test of time.
Final Checks Before Applying Paint
Before embarking on the actual painting process, conducting final checks is indispensable to ensure a flawless finish. Skipping this step could lead to poor adhesion, uneven coats, or imperfections that may compromise the overall appearance and longevity of your paint job. Below are practical steps to help you perform thorough final checks before applying paint.
Assess Surface Cleanliness
- Inspect with proper lighting: Use bright or angled lighting to identify dust, smudges, or grease that might not be visible under normal conditions.
- Wipe down the surface: Use a lint-free cloth slightly dampened with a cleaning solution (appropriate for your material) to remove any remaining particles or oils.
- Tack cloth for precision: For delicate surfaces or fine dust, use a tack cloth to pick up any residual debris without leaving fibers behind.
Verify Smoothness of Sanding Work
- Run your hand over the surface: Feel for rough spots or raised edges that may need additional sanding.
- Use a flashlight at an angle: This helps identify uneven areas or scratches that might not have been caught earlier.
- Resand if necessary: If imperfections are found, lightly resand the affected areas using fine-grit sandpaper (e.g., 220–320 grit).
Examine Repairs and Filler Application
- Check for level repairs: Run a straightedge tool over filled areas to ensure they’re flush with the surrounding surface.
- Inspect filler adhesion: Ensure no filler edges are lifting away from the substrate.
- Refinish as needed: If any repairs appear incomplete, reapply filler and sand once dry.
Ensure Primer is Evenly Applied
Indicator | What to Look For | Solution if Issue Found |
Uneven Color | Patches of differing primer shades | Apply another coat of primer evenly |
Visible Stains | Bleed-through from beneath | Spot-prime problem areas |
Surface Texture | Rough spots due to improper priming | Lightly sand and clean |
Environmental Conditions Check
- Temperature range: Ensure room temperature aligns with paint manufacturer recommendations (usually 50–85°F/10–30°C).
- Humidity levels: Keep humidity below 50% where possible; excessive moisture can delay drying and affect adhesion. Use a dehumidifier if needed.
- Ventilation: Confirm there’s proper airflow in your workspace but avoid direct drafts as they might disturb wet paint.
Organize Tools and Materials
Checklist: – Properly sized brushes/rollers – Paint trays and liners – Masking tape for edges – Drop cloths/floor coverings
Having everything prepared minimizes disruptions during painting.
By prioritizing these final checks before applying paint, you set the stage for professional-grade results while avoiding common pitfalls in execution.
Recent Posts

How to Spot Hidden Damage After a Car Accident
Why Hidden Damage Is Common After Collisions Car accidents, whether minor fender benders or major collisions, can leave behind damage that isn’t immediately visible to the naked eye. This hidden damage can pose serious risks if left unchecked, not only affecting the safety of your vehicle but also potentially leading…

How Frame Alignment Restores Vehicle Safety
What Is Frame Alignment in Auto Body Repair Frame alignment is a critical process in auto body repair that ensures the structural integrity of a vehicle after it has been involved in a collision, sustained damage, or undergone any form of impact that affects its frame. Essentially, frame alignment is…
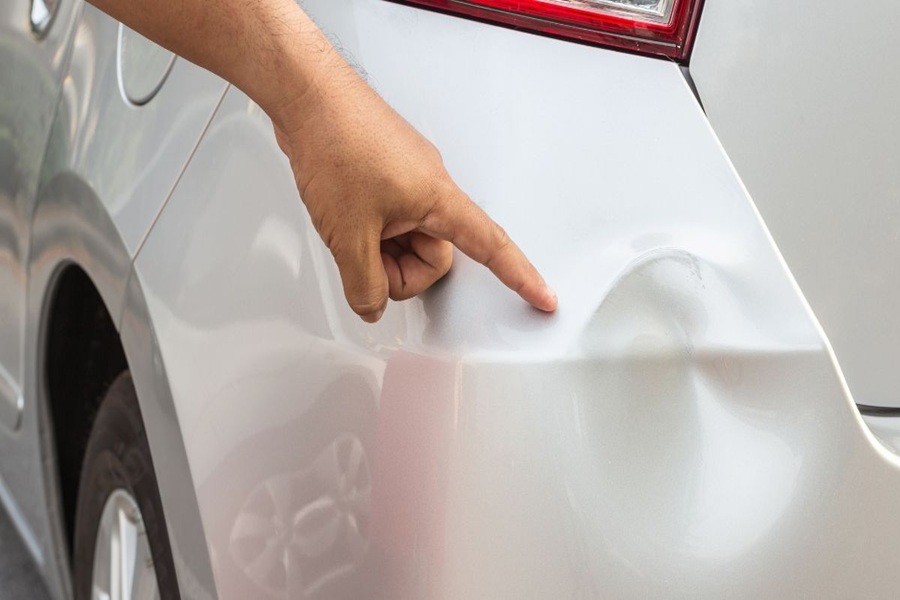
How to Know If Your Bumper Can Be Repaired
Common Types of Bumper Damage Explained Bumpers are designed to absorb and distribute impact energy during collisions, making them a critical component of vehicle safety. Due to their role, bumpers are often the first part of the car to sustain damage in an accident. Understanding the common types of bumper…