Road Trip Preparation: Essential Maintenance Before Long Drives
Check Engine Oil and Fluids
One of the most critical steps in preparing your car for a long road trip is ensuring that the engine oil and other essential fluids are at their optimal levels. Neglecting these can lead to poor vehicle performance or even breakdowns during your journey.
Why Engine Oil Matters
Engine oil lubricates the moving parts inside your engine to prevent overheating and minimize wear. Over time, oil degrades, becoming less effective at performing its job, which is why regular checks are necessary before any extended drive.
Steps to Check and Refill Engine Oil
- Let the Engine Cool: Wait at least 15 minutes after turning off the engine for an accurate measurement.
- Recheck levels after adding to avoid overfilling.
If you’re unsure when your last oil change occurred or notice dark or sludgy oil during this inspection, consider getting an oil change before hitting the road.
Other Essential Fluids
Fluid Type | Purpose | When/How To Check | Signs It Needs Attention |
Coolant/Antifreeze | Prevents overheating & freezing | Check reservoir when engine is cold | Low levels, visible leaks |
Transmission Fluid | Enables smooth gear shifts | Use dipstick (if applicable) | Burnt smell, difficulty shifting gears |
Brake Fluid | Ensures proper braking power | Inspect reservoir (usually near firewall) | Low fluid indicates possible leaks |
Power Steering Fluid | Assists steering effort | Look for reservoir markings | Difficulty steering, whining noises |
Windshield Washer Fluid | Keeps windshield clean | Test spray function; top up as needed | Empty reservoir or ineffective spray |
Pro Tips for Long Drives
- Stock up on extra motor oil and coolant in case of emergencies while traveling through remote areas.
- Always use fluids recommended by your vehicle’s manufacturer; check your owner’s manual for specifications.
By taking these steps seriously, you’ll ensure smooth engine performance throughout your road trip without unexpected interruptions due to something as preventable as low or dirty fluids. Proper care now saves money and stress later on during your adventure.
Inspect Tires and Tire Pressure
Proper tire inspection and maintenance are crucial for a safe and smooth road trip. Neglecting this step can result in reduced fuel efficiency, uneven tire wear, or even dangerous blowouts during your drive. Before heading out on your journey, allocate time to carefully inspect your tires and ensure they are in optimal condition.
Key Areas to Inspect on Your Tires
- Tire Tread Depth:
Use a tread depth gauge to check if the treads are above the recommended minimum depth of 2/32 inches. If the tread wear indicators (small raised bars between treads) are level with the tread surface, it’s time to replace the tires. - Uneven Wear Patterns:
Uneven wear may indicate issues such as improper wheel alignment, unbalanced tires, or incorrect inflation. Addressing these problems before your trip can prevent further damage and improve handling. - Cracks or Bulges:
Examine the sidewalls for visible cracks, gouges, or bulges. These can indicate structural damage that may lead to tire failure. - Foreign Objects:
Check for any embedded nails, screws, or debris that could lead to slow air leaks over time.
Checking Tire Pressure
Under-inflated or over-inflated tires can negatively impact safety and fuel economy.
- Refer to your vehicle owner’s manual or driver-side door placard for the recommended tire pressure (measured in PSI – pounds per square inch).
- Use a reliable tire pressure gauge (digital gauges tend to be more accurate than analog ones).
- Check each tire’s pressure when the tires are cold (i. e. , before driving for long distances).
- Inflate or deflate as needed using an air pump available at most gas stations.
Tire Issue | Possible Consequence | Solution |
Low Tread Depth | Reduced traction, longer braking distance | Replace affected tires |
Over/Under Inflation | Decreased efficiency, higher blowout risk | Adjust PSI accordingly |
Uneven Wear | Poor handling, decreased lifespan | Check alignment/balance |
Cracks/Bulges | Risk of blowout | Replace damaged tires |
Spare Tire Check
Don’t forget about your spare tire—it could be a lifesaver in case of an emergency. Ensure it is properly inflated and free from visible damage. Also confirm you have all necessary tools for changing a flat: jack stand, lug wrench, and any specialized tools required by your vehicle model.
Additional Tips for Tire Care on Long Drives
- Rotate your tires if it hasn’t been done recently (this should generally occur every 5,000–7,500 miles). Proper rotation promotes even wear across all four tires.
- Consider carrying a portable air compressor for quick adjustments on the road.
- If traveling over diverse terrains like gravel roads or mountainous regions, ensure that your tires are suitable for those conditions.
By prioritizing thorough tire inspections and addressing any issues before departure, you’ll not only enhance safety but also enjoy peace of mind throughout your road trip adventure.
Test the Battery
Ensuring your vehicle’s battery is in top condition is a critical step in preparing for a road trip. A faulty or weak battery can leave you stranded, especially if you’re traveling through remote areas.
Why Testing Your Battery Matters
- Reliability: The battery powers essential components like the starter motor and electrical systems, ensuring the engine starts reliably.
- Longevity: Regular testing and maintenance can extend the life of your battery, potentially saving you from unexpected expenses.
- Safety: An underperforming battery may compromise critical safety systems like headlights and ABS brakes that rely on electrical power.
Signs of a Weak Battery
Before testing, watch for these warning signs of a failing battery:
– Slow engine cranking or difficulty starting the car.
– Dim headlights or interior lights when idling.
– Electrical issues with features like radio, windows, or dashboard displays.
– Corrosion buildup around terminals (a chalky white or bluish residue).
Steps to Test Your Car Battery
- Check for any physical damage like cracks or leaks on the battery casing.
- Inspect terminals for corrosion; clean them with a mix of baking soda and water if necessary.
- Use a multimeter to measure voltage across the terminals.
- A fully charged car battery should read between 12. 6V and 12. 8V when the engine is off.
- If it reads below 12. 4V, consider recharging or replacing it.
- Take your vehicle to an auto shop for a professional load test if you’re unfamiliar with tools required.
- This measures how well your battery performs under simulated driving conditions.
- Start your car and test voltage again—this time it should measure between 13. 7V to 14. 7V while running (indicating proper alternator charging).
- Ensure cables are tightly connected to terminals; loose connections can mimic symptoms of a weak battery.
Specification | Healthy Levels |
Voltage (Engine Off) | Ideal: 12.6–12.8V / Low (Recharge): <12.4V |
Voltage (Engine On) | Normal Alternator Output: Between 13.7–14.7V |
Tips for Maintenance During Road Trips
- Carry portable jumper cables or invest in a compact jump starter pack as an emergency backup.
- Park in shaded areas during summer trips to avoid excessive heat exposure that drains batteries faster.
- Avoid leaving interior lights, chargers, or accessories running when parked overnight.
By taking these precautions to evaluate and maintain your vehicle’s battery health, you’ll reduce the chances of delays caused by electrical issues during your journey — keeping everything running smoothly from start to finish!
Test Lights and Wipers
When preparing for a road trip, ensuring your vehicle’s lights and wipers are in excellent condition is critical for safety and visibility. These components not only help you navigate effectively but also ensure that other drivers can see you clearly. Poor visibility caused by faulty lights or ineffective wipers can lead to dangerous driving conditions, especially during adverse weather or low-light situations. Below is a guide on how to inspect and maintain these essential systems.
Inspecting Vehicle Lights
Check each light on the vehicle systematically to ensure they are functioning correctly. This includes headlights, taillights, brake lights, turn signals, reverse lights, and hazard lights.
- Test both high-beam and low-beam settings.
- Look out for dimming or flickering; this could indicate a bulb nearing the end of its life or electrical issues.
- Clean the headlight lenses thoroughly to remove dirt or cloudiness that could reduce brightness.
- Ask someone to stand behind your vehicle while you press the brakes to confirm proper functionality.
- Replace any burnt-out bulbs promptly as these are critical for alerting drivers behind you.
- Activate left and right turn signals individually.
- Ensure they blink at a consistent speed; excessively fast blinking might indicate a bulb failure.
- Engage your hazard warning system briefly to ensure all four indicators are operational.
Pro Tip:
Carry spare bulbs in your car toolkit. Some roadside emergencies can be quickly resolved if you have the necessary replacements on hand.
Testing Windshield Wipers
Windshield wipers play a crucial role in maintaining clear visibility during rain, snow, or dusty conditions. Worn-out blades can smear water rather than removing it effectively.
How to Test Your Wipers:
- Spray windshield washer fluid onto the glass.
- Activate the wiper system at different speed settings.
- Check for smooth movement across the windshield without skipping or streaking.
Signs You Need New Wiper Blades:
- Streaks of water remain after wiping.
- The rubber blade appears cracked, torn, or unevenly worn.
- You hear squeaking noises when operating them.
Replacing windshield wiper blades is simple and inexpensive; consult your owner’s manual for size specifications if unsure.
Windshield Washer System
Don’t overlook your windshield washer fluid! Confirm that it’s filled with proper washer fluid (not plain water) to clean effectively without freezing in colder temperatures. If necessary: – Refill with windshield washer fluid that contains antifreeze additives if traveling through cold climates. – Inspect nozzles for clogs that could prevent adequate spray coverage on the windshield.
Practical Maintenance Checklist
Task | Frequency | Notes |
Clean all lighting lenses | Before every trip | Use a soft cloth and gentle cleaner |
Replace bulbs | As needed | Carry spares while on long journeys |
Change wiper blades | Every 6–12 months | Replace sooner if heavily used |
Refill washer fluid | Monthly | Use seasonally appropriate formula |
Maintaining functional lights and reliable wipers not only enhances safety but also adds peace of mind during long drives. Taking time before departure to check these components ensures you’re ready for diverse weather conditions and nighttime travel without unnecessary risks or stress along the way.
Test Lights and Wipers
Properly functioning lights and wipers are essential for road safety, especially when embarking on a long drive. Visibility can be significantly impacted by weather conditions or nighttime driving, so ensuring these components are in top condition is critical. Below are key steps and tips to help you test and maintain your vehicle’s lights and wipers effectively.
Why Lights Matter
- Headlights: These ensure you can see the road ahead and allow other drivers to spot your vehicle during low-visibility conditions.
- Taillights: Crucial for signaling your presence from behind, especially in poor weather or at night.
- Turn signals: Help communicate lane changes or turns to surrounding vehicles.
- Brake lights: Warn drivers behind you when you’re slowing down or stopping.
- Fog lights (if applicable): Provide better visibility during heavy fog, rain, or snow.
Testing Your Vehicle’s Lights
- Start your vehicle and turn on the headlights. Confirm both low-beam and high-beam settings work correctly.
- Inspect for dimness or flickering as these indicate aging bulbs or electrical issues.
- With the help of another person—or by parking near a reflective surface—test if all taillights illuminate properly when the headlights are turned on.
- Activate the left and right turn signals individually while observing if they blink consistently without unusual speed (hyper-flashing may suggest a bulb outage).
- Ask someone to stand behind the car while pressing the brake pedal to ensure all brake lights illuminate clearly.
- Engage hazard flashers to check if all four corners of your vehicle signal appropriately.
- Test their operation and confirm they’re aligned correctly for optimal coverage without blinding other drivers.
Maintaining Vehicle Lighting
- Replace any burnt-out bulbs promptly with manufacturer-recommended replacements.
- Clean light covers regularly; dirt buildup can dim brightness over time.
- Align headlights properly to prevent blinding oncoming traffic while maximizing visibility.
Why Wipers Are Critical
Functional windshield wipers ensure a clear view by removing water, dirt, snow, or debris efficiently, keeping you safe during adverse weather conditions.
How to Test Windshield Wipers
- Activate the wipers on both low-speed and high-speed settings.
- Check for smooth movement across the windshield; there should be no jerking or skipping.
- Spray windshield washer fluid and confirm it distributes evenly across the glass while wiping cleanly.
Signs of Worn-Out Wiper Blades
- Streaking water is left behind on glass surfaces after wiping.
- Squeaking noises during operation indicate hardened rubber blades.
- Cracks, tears, or visible wear on wiper edges signal it’s time for replacement.
Maintaining Wipers Effectively
- Replace blades every 6–12 months depending on usage frequency and climate conditions.
- Clean wiper blades periodically using a damp cloth soaked in mild soap solution; this removes debris that could scratch your windshield.
- Refill washer fluid reservoir with appropriate cleaning solutions designed for automotive use (avoid plain water which may freeze in cold climates).
Maintenance Task | Recommended Frequency |
Replace light bulbs | As needed (check monthly) |
Change wiper blades | Every 6–12 months |
Clean light covers | Monthly |
Refill washer fluid | Before long trips/as needed |
Ensuring both lights and wipers are fully operational will give you peace of mind while driving through varying conditions—whether it’s navigating dark highways at night or managing unexpected rain showers mid-trip—all contributing to a safer journey ahead.
Check the Air Conditioning and Cabin Filter
Properly functioning air conditioning is essential for a comfortable road trip, especially during warmer months. The cabin filter also plays a significant role in maintaining air quality inside your vehicle by trapping dust, pollen, and other pollutants. Before embarking on your journey, it’s crucial to assess both the air conditioning system and the cabin filter to ensure they are operating efficiently. Here’s how you can prepare these components for your trip.
Why Inspect the Air Conditioning System?
Driving in a car with poor air conditioning can make long hours on the road uncomfortable, particularly in hot or humid climates. Your AC system doesn’t just keep you cool; it also helps prevent windows from fogging up by regulating humidity levels inside the car.
Signs that your air conditioning system might need maintenance:
– Weak airflow from vents.
– Air isn’t cooling properly or takes too long to cool.
– Unusual odors when the AC is running (may point to mold or mildew).
– Strange noises like rattling or hissing when the system is turned on.
Steps to Check and Maintain Your AC System
- Test its Performance: Turn on your car’s air conditioning at its highest setting and check how quickly it cools down the interior of your vehicle.
- Inspect Refrigerant Levels: Low refrigerant is one of the most common reasons for poor AC performance. This task typically requires professional servicing as refrigerants are handled under regulated conditions.
- Check for Leaks: Look for signs of leakage under the vehicle or unusual moisture buildup around vents—both could indicate problems with seals or components like hoses.
- Clean Vents: Dust may accumulate in vent openings over time, reducing airflow efficiency. Use a vacuum attachment to clear debris from vent grilles.
- Professional Inspection: If performance issues persist, consider having an expert inspect critical parts such as compressors, condensers, and evaporators.
Why Replace or Clean Your Cabin Air Filter?
Cabin filters are often overlooked but play an essential role in providing fresh air within your car by trapping airborne particles like dirt and allergens. A clogged cabin filter can hinder airflow and may even reduce AC performance.
You should replace or clean your cabin filter if you notice these signs: – Reduced airflow through vents. – Persistent unpleasant odors inside the car. – Increased dust settling on dashboard surfaces despite regular cleaning.
How to Address Cabin Filter Issues
Task | Description | Notes |
Locate Cabin Filter | Refer to your owner’s manual for location—it’s often behind glove compartments or under dashboards. | Use tools if necessary for access. |
Visual Inspection | Check if there’s visible dirt buildup—look for dark discoloration. | Filters should typically be white/gray when clean. |
Clean vs Replace | If washable (check manual), use water and mild soap; otherwise, replace with a new one of appropriate size. | Ensure replacement aligns with manufacturer specs. |
Preventive Measures
To avoid future issues: – Replace cabin filters every 12 months or earlier depending on driving conditions (e. g. , dusty roads).
– Run your AC periodically throughout the year—even during cooler months—to keep its internal components lubricated and functional.
By ensuring both systems are in top shape before hitting the road, you’ll create not only a more enjoyable travel experience but also mitigate potential health concerns caused by poor air quality inside your vehicle during long-distance drives.
Check the Air Conditioning and Cabin Filter
Ensuring optimal air conditioning performance and a clean cabin filter is essential for a comfortable and safe road trip, especially during hot or humid weather. Neglecting these components can lead to discomfort inside the vehicle, reduced air quality, and even potential strain on the system. Here’s how to prepare your car’s air conditioning (A/C) system and cabin filter before a long drive.
Why Check the Air Conditioning System?
A properly functioning A/C system does more than just cool the cabin—it also helps dehumidify the air inside your car, improving visibility by preventing window fogging. Over time, A/C components can wear out or lose refrigerant, reducing cooling efficiency.
– Refrigerant Levels:Low refrigerant causes insufficient cooling or warm air blowing from vents. Have it checked and refilled if necessary by a certified technician.Cooling Efficiency Test:Turn on your A/C at full blast to ensure cold air is distributed evenly across all vents.Inspect for Leaks:Look for oil stains around hoses or connections—a common sign of refrigerant leakage.Compressor Behavior:Listen for unusual noises when running the A/C; squealing or rattling could indicate compressor issues.
Importance of a Clean Cabin Air Filter
The cabin air filter plays an important role in maintaining good indoor air quality by trapping dust, pollen, pollutants, and debris from entering your vehicle’s interior through the A/C system. Over time, it can get clogged, reducing airflow and making it harder for your A/C to cool effectively.
Signs of a dirty cabin filter include: – Weak airflow from vents even with fan settings on high. – Musty or unusual odors when using climate controls. – Increased dust accumulation in your car’s interior.
Steps to Inspect and Replace the Cabin Filter
Replacing a cabin filter is often straightforward and can be done without professional help if you follow these steps: 1.Locate the Cabin Filter Compartment:– Usually found behind the glove box in most vehicles. 2.Remove Old Filter:– Carefully pull out the used filter while avoiding scattering trapped dirt into the compartment. 3.Examine Condition:– If it’s covered in debris or has discoloration (dark gray/brown), it’s time to replace it. 4.Install New Filter:– Insert a replacement that matches your car’s make/model specifications (check owner’s manual).
Maintaining a clean cabin filter ensures better airflow efficiency while improving health by minimizing allergens inside your vehicle.
When Professional Help May Be Needed
While some minor maintenance tasks like replacing a cabin filter can be handled at home, others—such as diagnosing refrigerant leaks or repairing compressor issues—require specialized tools and expertise. Always consult an auto repair shop if you experience persistent cooling problems.
Component | DIY Task? | When to Seek Professional Help |
Refrigerant Refill | No | If cold air isn’t coming through vents |
Compressor Inspection | No | For strange noises or mechanical failure |
Cabin Filter Replacement | Yes | If dirty; consult manual for location |
Taking care of these tasks ahead of time ensures you’ll have an enjoyable ride with fresh airflow and consistent cooling throughout your journey—a crucial step toward preparing for any road trip comfortably!
Recent Posts

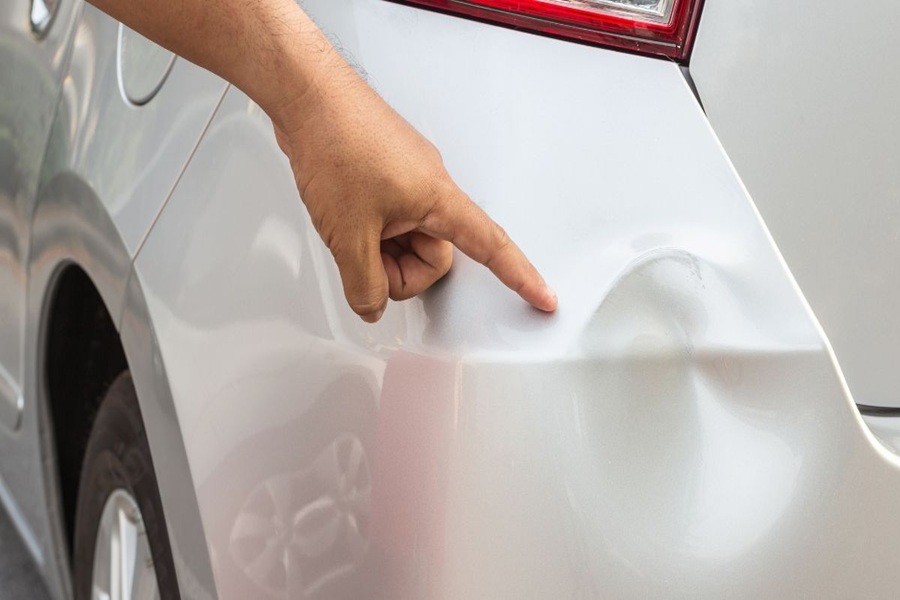
How to Spot Hidden Damage After a Car Accident
Why Hidden Damage Is Common After Collisions Car accidents, whether minor fender benders or major collisions, can leave behind damage that isn’t immediately visible to the naked eye. This hidden damage can pose serious risks if left unchecked, not only affecting the safety of your vehicle but also potentially leading…

How Frame Alignment Restores Vehicle Safety
What Is Frame Alignment in Auto Body Repair Frame alignment is a critical process in auto body repair that ensures the structural integrity of a vehicle after it has been involved in a collision, sustained damage, or undergone any form of impact that affects its frame. Essentially, frame alignment is…
How to Know If Your Bumper Can Be Repaired
Common Types of Bumper Damage Explained Bumpers are designed to absorb and distribute impact energy during collisions, making them a critical component of vehicle safety. Due to their role, bumpers are often the first part of the car to sustain damage in an accident. Understanding the common types of bumper…