Rust Repair: Prevention and Early Treatment
What Causes Rust on Vehicles
Rust, scientifically known as iron oxide, is a corrosive reaction that occurs when metal is exposed to oxygen and moisture over time. On vehicles, this process can be accelerated due to environmental factors and the materials used in their construction. Understanding the root causes of rust formation can help vehicle owners take proactive measures to mitigate its effects.
Key Factors Leading to Rust Formation
- Frequent exposure to rainwater, snow, or even high humidity levels can create an ideal environment for rust to develop.
- Road salt combined with water significantly speeds up the corrosion process by creating a chemical reaction with exposed metal surfaces.
- Coastal regions with salty air can exacerbate rust development due to their high salt content.
- Areas with heavy snowfall often use de-icing chemicals on roads, which contribute to corrosion when they come into contact with vehicles.
- A vehicle’s paint acts as the first line of defense against rust. Scratches, chips, or peeling paint expose bare metal underneath, making it vulnerable.
- Lack of protective coatings like wax also leaves metal surfaces unprotected over time.
- Dirt and debris trapped in wheel wells or undercarriages retain moisture for extended periods, increasing the likelihood of corrosion.
- Failure to clean or inspect these areas regularly allows small issues to escalate into larger problems.
- Dents or minor collisions that compromise a car’s surface integrity can create entry points for water and oxygen.
- Even small cracks in the protective layers on your vehicle’s bodywork may lead to hidden rust development.
Types of Rust Commonly Found on Vehicles
Type | Description | Severity |
Surface Rust | Usually found on the exterior paint layer; appears as small patches of orange discoloration. | Low |
Scale Rust | Develops when surface rust is left untreated; causes deeper damage by affecting structural metal. | Medium |
Penetrating Rust | Advanced stage where corrosion fully eats through metal parts, compromising their integrity. | High |
The Role of Manufacturing Materials
Modern vehicles are designed using lighter materials like aluminum alloys that resist rust better than traditional steel components used in older models. However: – The undercarriage and frame still often rely on steel, which remains susceptible. – Advances in coatings have slowed down but not eliminated the potential for corrosion over time.
Why Early Intervention Matters
Addressing minor damage promptly can prevent more costly repairs later: – Small scratches or chips may seem insignificant but serve as entry points for moisture. – Ignoring early warning signs such as bubbling paint or reddish spots could lead to structural issues that affect both safety and performance.
By understanding these causes and risk factors, you can take strategic steps toward protecting your vehicle from unnecessary wear and tear caused by rust formation. Proper prevention starts with awareness—this means recognizing vulnerabilities before they evolve into serious problems requiring extensive repairs.
Early Signs of Rust You Shouldn’t Ignore
Visual Clues
- Brown or Orange Discoloration: Rust typically starts as small spots or streaks of orange-brown discoloration on metal surfaces. These are often found near scratches, chips, or areas with damaged paint.
- Bubbling Paint: When rust forms beneath the surface, it can cause paint to bubble or lift. This is a clear indicator that moisture is trapped underneath and corrosion has already begun.
- Surface Stains: Rust particles can sometimes leave stains on nearby non-metal components, such as plastic trim or rubber seals, acting as an indirect warning sign.
Textural Changes
Running your fingers over certain areas of your vehicle may help you detect early rust formation: – Rough Spots: Even if rust hasn’t visibly developed, rough or grainy patches on smooth surfaces may signal that oxidation is beginning. – Flaking Metal: In some cases, early-stage rust can cause metal to flake slightly along edges or seams.
Common Problem Areas
Certain parts of a vehicle are more prone to rust due to their exposure to moisture and road debris: 1. Wheel Wells and Undercarriage: These areas encounter constant splashes from rainwater, snow, and mud. 2. Door Edges and Sills: Moisture often collects in these sections due to poor sealing or blocked drainage holes. 3. Hood and Trunk Latches: These components are vulnerable as they’re often neglected during routine cleaning. 4. Exhaust System Components: High temperatures combined with condensation make exhaust pipes especially susceptible.
Strange Noises or Movements
In some cases, mechanical signs may point toward hidden rust issues: – A creaking sound when opening doors could indicate corroded hinges. – Loose bumper brackets might be caused by weakened metal supports due to hidden oxidation.
How Early Detection Saves Money
Addressing rust at its earliest stage minimizes repair costs by preventing minor surface damage from spreading into structural damage. For instance: | Rust Stage | Repair Type | Estimated Cost Range | |——————–|——————————|———————-| | Surface Rust | Sanding + Repainting | $50–$150 | | Scale Rust | Grinding + Filler Application| $200–$500 | | Penetrating Rust | Welding + Replacement Panels | $1,000+ |
By addressing issues when they first appear—whether through DIY repairs for minor cases or professional intervention when necessary—you not only save money but also preserve your vehicle’s safety and resale value.
Detecting early signs of rust ensures that you stay one step ahead in maintaining your vehicle’s longevity while avoiding costly long-term problems caused by neglect.
How to Prevent Rust Before It Starts
Preventing rust before it begins is one of the most effective ways to preserve the longevity and appearance of your vehicle. By taking proactive steps, you can minimize the risk of corrosion and maintain your car’s structural integrity. Below are practical strategies and methods to prevent rust formation, along with tips on maintaining your vehicle.
Understand Where Rust Forms
Rust tends to develop in areas that are frequently exposed to moisture, dirt, salt, or road grime. Common areas include: – Wheel wells: Constant exposure to water and dirt makes this area highly susceptible.
– Undercarriage: The underside of a vehicle is particularly vulnerable due to road salt, especially in winter.
– Door edges and seams: Water often collects here after rain or car washes.
– Exhaust system: High heat combined with moisture can accelerate rust formation here.
By identifying these high-risk areas, you can be vigilant in maintaining them.
Regular Cleaning and Washing
Dirt and debris can trap moisture on your vehicle’s surface, creating an ideal environment for rust to form. Regular cleaning helps remove these contaminants: – Wash your car at least once every two weeks during regular weather conditions. – During winter or in coastal areas where salt exposure is higher, wash weekly. – Pay special attention to the undercarriage; many car washes offer undercarriage cleaning services specifically designed for this purpose.
Waxing for Protection
Waxing forms a protective barrier between your car’s paint and external elements: 1. Apply a layer of high-quality automotive wax every 3–4 months. 2. Focus on seams, edges, and other vulnerable areas. 3. Use a microfiber cloth for even application without scraping the paintwork.
Regular waxing not only prevents rust but also enhances the shine and appearance of your vehicle.
Use Protective Coatings
In addition to waxing, several specialized products provide long-term protection against corrosion: – Undercoating sprays: These create a durable barrier on the undercarriage to resist saltwater and debris damage. – Ceramic coatings: While more expensive than waxes, they offer superior durability against moisture penetration. – Rust inhibitors: Spray-on inhibitors can be applied directly onto metal surfaces prone to oxidation.
When applying coatings or inhibitors yourself: – Ensure that surfaces are clean and dry prior to application. – Follow product instructions carefully for maximum effectiveness.
Avoid Prolonged Exposure to Moisture
Moisture is one of the biggest contributors to rust formation. Simple habits can make a big difference: – Dry off wet spots after heavy rain or snow using absorbent towels. – Store your car in a garage whenever possible. – If no garage is available, consider using a breathable waterproof car cover. – Avoid parking under trees for prolonged periods as they may drip sap or hold moisture on your vehicle’s surface.
Inspect Your Vehicle Regularly
To prevent small issues from becoming major problems: 1. Conduct visual inspections at least once per month. 2. Look closely at seam lines, wheel arches, door edges, and underbody components for any signs of bubbling paint (a precursor to rust). 3. Address chips or scratches immediately by touching up with matching automotive paint.
Inspection Area | Frequency | Action Required |
Underbody | Monthly | Check for mud/salt buildup; rinse thoroughly |
Wheel wells | After off-road driving/heavy rain | Remove buildup using hose |
Paint chips/scratches | As needed | Touch up paint; apply clear coat if required |
By creating a habit of regularly checking these areas, you’ll catch potential issues early—saving time and money later on.
With consistent cleaning routines, protective coatings like waxes or sprays, proper storage practices, and regular inspections tailored toward high-risk areas like the undercarriage or wheel wells—you’ll significantly cut down on the chances of rust ever forming on your vehicle. Prevention truly is better than repair when it comes to something as potentially damaging as corrosion.
Tools and Materials Needed for Rust Repair
When tackling rust repair on your vehicle, having the right tools and materials at hand is essential. Whether you’re addressing minor surface rust or preparing for more extensive work, the proper equipment can make the process smoother, safer, and more effective. Below is a breakdown of the essential tools and materials you’ll need to successfully treat rust.
Essential Tools for Rust Repair
- Wire Brush or Wire Wheel
Useful for removing loose rust and paint in affected areas. Handheld wire brushes are great for precision work, while wire wheels attached to drills can cover larger surfaces quickly. - Sandpaper or Sanding Blocks
Choose abrasive grits ranging from coarse (80-120 grit) to fine (400-600 grit). Start with coarse grit to remove stubborn rust spots and finish with finer grits to smooth out surfaces. - Drill with Attachments
A drill equipped with sanding discs or wire wheel attachments can save time on larger projects, especially when working on hard-to-reach areas. - Rust Remover Solution
Chemical rust removers break down corrosion effectively. Look for a product compatible with automotive surfaces. - Body Filler Spreader
Used to evenly apply fillers needed after removing deep rust pits or structural damage. - Protective Equipment
Always prioritize safety:- Nitrile gloves protect your hands from chemicals.
- Safety goggles shield your eyes from flying debris.
- A dust mask or respirator prevents inhalation of particles during sanding.
Materials Required for Rust Repair
Material | Purpose |
Rust Converter | Chemically neutralizes existing rust into a paintable surface. |
Primer (Rust-Inhibiting) | Prepares metal surfaces for paint while preventing future corrosion. |
Automotive Paint | Matches your vehicle’s color to ensure a seamless repair. |
Body Filler (e.g., Bondo) | Fills in dents or deep pits caused by heavy rusting. |
Clear Coat Spray | Adds a protective layer over freshly painted areas. |
Additional Supplies Worth Considering
- Microfiber cloths or tack cloths for cleaning debris during prep stages.
- Masking tape and plastic sheeting to protect surrounding areas from overspray.
- Degreaser or surface cleaner to remove oil and dirt before applying primer or paint.
Preparation Tips
Before starting any repairs: 1. Work in a well-lit and ventilated area. 2. Wash the vehicle thoroughly to remove dirt that could hinder repairs. 3. Inspect all areas carefully—rust may extend further than it initially appears. 4. Organize all tools and materials beforehand to avoid interruptions during the process.
Having these tools and materials readily available ensures you’re prepared to handle rust effectively, whether you’re addressing minor surface issues or preparing for more extensive repairs. With careful preparation, you’ll not only extend the life of your vehicle but also improve its overall appearance significantly.
Step-by-Step Guide to Treating Surface Rust
Addressing surface rust as early as possible is crucial for maintaining your vehicle’s structural integrity and appearance. Below is a detailed step-by-step guide to treating surface rust effectively. Using the right tools, materials, and techniques can help prevent further corrosion and extend the life of your vehicle.
Step 1: Gather Necessary Tools and Materials
Tools:
– Wire brush or drill with a wire-wheel attachment
– Sandpaper (medium to fine grit: 120–320 grit)
– Paint scraper (optional for flaky rust)
Materials:
– Rust remover or converter (chemical-based)
– Rust-inhibiting primer
– Automotive touch-up paint or spray paint (color-matched)
– Microfiber cloths or rags
– Masking tape and plastic sheeting (to protect unaffected areas)
Optional but helpful items include safety goggles, gloves, and a respirator mask to avoid inhaling dust or fumes.
Step 2: Prepare the Work Area
- Wash the affected area thoroughly with car soap and water to remove dirt, grease, and debris. Allow it to dry completely.
- Use masking tape to cover unaffected areas of your car’s body panels, windows, or trims that could be exposed during sanding or painting.
Step 3: Remove Loose Rust and Paint Layers
- Use a wire brush or drill with a wire-wheel attachment to scrape away loose flakes of rust. Be thorough but avoid excessive pressure that could damage the underlying metal.
- Sand the remaining rusty area with medium-grit sandpaper (120–240 grit). This smoothens rough edges and removes embedded contaminants.
- Gradually switch to finer sandpaper (320 grit) for a polished finish that ensures better adhesion of primers and paints.
Step 4: Apply Rust Remover or Converter
- Wipe away any particles using a microfiber cloth until clean.
- Apply a thin layer of chemical rust remover/converter over remaining spots following product instructions.
- Allow adequate drying time; most products require anywhere from 15–30 minutes.
Tip: Use this stage wisely as it’s essential not only chemically neutralizes residual corrosion but prepares ideal primable conditions ahead next detailing refinements processes ahead adhesion adequate!
When Rust Damage Requires Professional Repair
While surface rust and minor corrosion can often be addressed through DIY methods, there are times when rust damage exceeds the scope of home remedies. Understanding when to seek professional assistance is essential to maintaining the structural integrity, safety, and value of your vehicle. Below, we’ll explore key considerations for identifying when it’s time to leave rust repair to the experts.
Structural Damage Assessment
When rust damages the structural components of a vehicle—such as the frame, suspension mounts, or floor panels—it poses serious safety risks. Structural rust weakens critical areas that support the vehicle’s weight and absorb impact during collisions. Signs that indicate structural concerns include: – Visible holes or perforations in metal parts. – Flaky or crumbling metal around load-bearing areas. – Sagging or uneven alignment of vehicle panels.
Repairing structural rust typically requires specialized equipment like welding tools and an in-depth understanding of automotive engineering. A professional will reinforce compromised areas while ensuring repairs meet safety standards.
Advanced Corrosion Spread
In cases where rust has progressed beyond surface-level damage—often referred to as “scale” or “penetrating” rust—it can spread deeply into the metal layers. This type of corrosion is challenging to treat without advanced tools and techniques, such as: – Sandblasting: To strip away thick layers of corrosion. – Chemical treatments: Professionally applied rust converters designed for severe damage. – Replacement: Severely corroded components may need to be replaced entirely if treatment isn’t feasible.
Attempting to repair advanced corrosion yourself can lead to incomplete removal or weakened results.
Paint and Finish Restoration
If large sections of paint have peeled away due to widespread rust, achieving a seamless restoration at home can be nearly impossible without professional-grade equipment. Professionals have access to tools like spray booths and computerized color-matching systems that ensure: – Flawless blending between repaired areas and existing paint. – Proper primer application for long-lasting results. – Protection against future environmental exposure.
DIY paint fixes often result in mismatched finishes or peeling over time.
Specialized Areas Requiring Expertise
Some parts of a vehicle are particularly challenging to repair due to their location or complexity. These include: | Area | Why Professionals Are Needed | |————————-|—————————————————————————————–| | Wheel wells | Difficult-to-access spaces prone to heavy wear from road debris and salt exposure | | Undercarriage | Requires lifting equipment for proper inspection and treatment | | Door frames and seams | Tight crevices where moisture tends to accumulate |
Professionals use advanced tools like rotisseries (to rotate vehicles) or borescopes (to inspect hard-to-see areas), ensuring thorough repairs even in hidden spaces.
Warranty Considerations
If your car is under warranty, attempting DIY repairs may void coverage if something goes wrong. Many manufacturers stipulate that significant repairs must be performed by certified service centers using approved methods. If you suspect extensive damage on a newer vehicle still covered under warranty, consulting a professional ensures compliance with these terms while protecting your investment.
Final Thoughts
Recognizing when rust repair requires professional intervention can save you time while preventing costly mistakes down the road. Tackling advanced corrosion yourself may seem tempting but could result in insufficient removal, cosmetic issues, or compromised safety features—all factors best handled by experienced technicians with the right knowledge and resources for effective treatment.
When Rust Damage Requires Professional Repair
Rust can often start as a minor issue, but when left untreated, it can spread and compromise the structural integrity of your vehicle. While some rust issues can be addressed with DIY methods, there are situations where professional intervention is not just recommended—it’s necessary. Understanding when to seek professional repairs can save you time, money, and prevent further damage to your vehicle.
Key Indicators That Professional Repair is Needed
- Structural Damage:
Surface rust on body panels might look unsightly but generally doesn’t affect the structural components of a vehicle. However, if rust has penetrated critical areas like the frame or undercarriage, it may compromise the safety of your vehicle. Indicators include holes in the metal or weakened parts that could fail under stress. - Extensive Corrosion:
If rust covers a significant portion of a panel or part, it’s often too advanced for DIY repair methods like sanding and repainting. Large-scale corrosion typically requires specialized tools and techniques to fully remove and restore. - Rust in Hard-to-Reach Areas:
Professionals have access to tools that can effectively treat areas you might not be able to reach at home. For example: - Inside wheel wells
- Interior seams
- The underside of panels These areas are more prone to moisture accumulation, making them hotspots for hidden rust damage.
- Paint Blistering Over Large Areas:
Bubbling or blistering paint is often an early sign of underlying rust. If this occurs across wide sections of the car’s surface, addressing this without professional tools could lead to incomplete treatment and accelerated spread.
Why Professional Repairs Are Beneficial
Benefit | Why It Matters |
Expertise | Trained technicians know how to assess damage properly and recommend appropriate fixes. |
Advanced Tools | Professionals use sandblasters, welders, and other specialized equipment unavailable to most homeowners. |
Long-Term Results | High-grade primers, sealants, and paints ensure durable protection post-repair. |
Situations That Might Require Replacement Instead of Repair
In some advanced cases where rust has compromised an entire component’s integrity—like a door panel or fender—it may be more cost-effective to replace the part entirely rather than attempt restoration. A professional mechanic will assess whether replacement or repair is best based on: – The cost difference between fixing versus replacing – The availability of replacement parts – How much time each option requires
Working with Auto Body Specialists
If you suspect your vehicle requires professional attention for rust damage: 1. Research local auto body shops with experience in rust repair. 2. Request an estimate based on both labor costs and materials. 3. Ask about aftercare services like applying sealants or undercoating treatments for long-term protection.
By recognizing the signs early and consulting experienced professionals when needed, you can ensure your vehicle remains structurally safe and visually appealing over time while avoiding prolonged damage that could lead to unsafe driving conditions down the road.
Recent Posts

How to Spot Hidden Damage After a Car Accident
Why Hidden Damage Is Common After Collisions Car accidents, whether minor fender benders or major collisions, can leave behind damage that isn’t immediately visible to the naked eye. This hidden damage can pose serious risks if left unchecked, not only affecting the safety of your vehicle but also potentially leading…

How Frame Alignment Restores Vehicle Safety
What Is Frame Alignment in Auto Body Repair Frame alignment is a critical process in auto body repair that ensures the structural integrity of a vehicle after it has been involved in a collision, sustained damage, or undergone any form of impact that affects its frame. Essentially, frame alignment is…
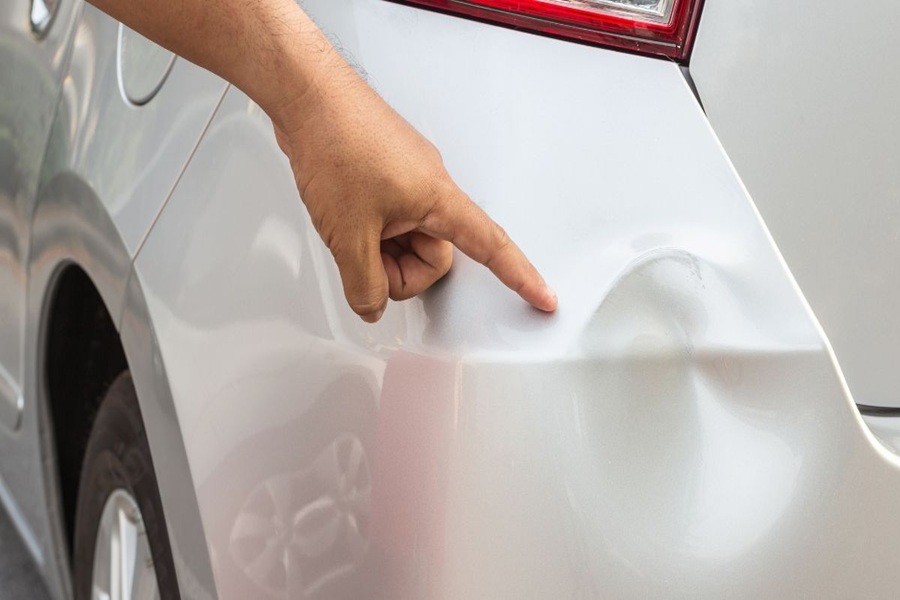
How to Know If Your Bumper Can Be Repaired
Common Types of Bumper Damage Explained Bumpers are designed to absorb and distribute impact energy during collisions, making them a critical component of vehicle safety. Due to their role, bumpers are often the first part of the car to sustain damage in an accident. Understanding the common types of bumper…