The Role of Surface Preparation in Successful Auto Paint Repair
Why Surface Preparation Is Critical in Auto Paint Repair
Surface preparation is one of the most crucial steps in achieving a professional and durable auto paint repair. It sets the foundation for how well the paint adheres, how long it lasts, and how visually appealing the final result will be. This process goes beyond aesthetics—proper surface preparation ensures that the repair can withstand environmental factors such as UV rays, moisture, and temperature changes.
The Role of Surface Preparation
- Adhesion: Paint cannot adhere properly to dirty or contaminated surfaces. Even minor residues like grease or dust can create weak spots where the paint may fail prematurely. Proper preparation eliminates these contaminants and creates a clean canvas for painting.
- Durability: When done correctly, surface prep ensures a longer-lasting finish by allowing the coating layers (primer, base coat, clear coat) to bond effectively.
- Smooth Finish: An unprepped surface with dents, scratches, or uneven areas will compromise the overall appearance of the repair. Prepping ensures these imperfections are addressed before painting.
- Preventing Common Issues: Without proper prep work, issues such as bubbling, peeling paint, or uneven color distribution may occur soon after application.
Importance in Professional vs DIY Repairs
Professionals in auto body shops dedicate significant time to preparing surfaces before applying paint because they understand its impact on long-term results. On the other hand, DIY enthusiasts sometimes overlook this step or rush through it—leading to subpar finishes that may degrade quickly.
Factor | Professional Prep Approach | Common DIY Oversight |
Cleaning & Degreasing | Thorough removal of all residues with specialized cleaners | Casual wiping with household cleaning products |
Sanding | Multi-stage sanding using varying grit levels | Limited sanding or skipping finer grit stages |
Imperfection Detection | Use of inspection tools like lights to spot minor flaws | Visual examination only |
Environmental Factors Make Prep Essential
Environmental conditions such as humidity levels and temperature fluctuations play a role in how well automotive paint adheres over time. A poorly prepared surface can easily lead to failures like blistering or cracking when exposed to these elements regularly.
- Remove moisture from surfaces using appropriate drying methods after cleaning.
- Sand away oxidation or rust that could compromise adhesion.
- Apply primers designed for specific climate conditions when necessary.
By giving attention to every detail during surface preparation—even those that seem minor—you ensure not only a professional look but also extended durability for auto repairs under all driving conditions.
Cleaning and Degreasing: The First Essential Step
When it comes to ensuring a professional-quality auto paint repair, cleaning and degreasing the surface is a non-negotiable first step. Paint adheres best to surfaces that are free of contaminants, and skipping this phase can result in peeling, bubbling, or uneven application down the line. Properly cleaned surfaces not only improve paint adhesion but also contribute to a more durable and visually appealing finish.
Why Cleaning and Degreasing Matter
- Uneven paint application
- Surface blemishes like fisheyes (small crater-like imperfections caused by oils)
- Reduced durability of the coating
- Premature paint failure
Cleaning ensures the surface is ready for subsequent preparation steps without interference from invisible residues.
Essential Tools and Materials
Tool/Material | Purpose |
Automotive Cleaner/Degreaser | Removes grease, wax, oils, and other contaminants |
Microfiber Cloth | Ensures streak-free cleaning without scratching |
Isopropyl Alcohol | Ideal for removing stubborn residues |
Bucket of Clean Water | For rinsing off soap or degreasers |
Spray Bottle | Helps apply cleaners evenly across the surface |
Step-by-Step Process for Cleaning & Degreasing
- Use clean water to rinse off loose dirt and debris from the vehicle’s surface.
- This step prevents larger particles from scratching during subsequent cleaning.
- Use an automotive-specific cleaner that targets grease and wax buildup.
- If using a spray bottle with water-based cleaner/degreaser, apply evenly across all affected areas.
- Gently scrub in circular motions with microfiber cloths to lift contaminants.
- Avoid using abrasive materials that could scratch or damage the existing finish.
- Wash off any remaining cleaner using clean water.
- Ensure no residue remains as it could interfere with later steps like sanding or priming.
- For stubborn oily spots or fingerprints not removed by general cleaners, use a diluted solution of isopropyl alcohol on affected areas.
- This ensures total cleanliness without leaving behind streaks.
Best Practices When Cleaning for Auto Paint Repair
- Always clean indoors or in shaded areas when possible since direct sunlight can dry cleaning agents prematurely.
- Work in small sections at a time to ensure thorough coverage before moving on.
- Replace cloths frequently if they become too dirty during use; reusing them could reintroduce contaminants rather than removing them.
- Wear gloves while applying degreasers—this avoids transferring oils from your hands back onto freshly cleaned surfaces.
By making cleaning and degreasing your first essential step before painting repairs begin in earnest, you set a solid foundation for smooth application processes ahead while minimizing potential problems after finishing touches are applied.
Sanding Techniques for a Smooth Finish
Why Sanding Matters
- Surface Leveling: Removes old paint remnants, scratches, and inconsistencies.
- Improved Adhesion: Creates micro-abrasions on the surface to help primer and paint bond better.
- Defect Removal: Eliminates minor imperfections like rust spots, oxidation, or peeling paint.
Types of Sandpaper and Their Uses
Grit Range | Purpose | Notes |
40-80 (Coarse) | Heavy material removal | Best for stripping old paint or rust |
120-180 (Medium) | Smoothing out surfaces | Great for leveling filler or primer |
220-400 (Fine) | Preparing for primer or basecoat | Prevents swirl marks |
1000+ (Ultra-Fine) | Wet sanding and finishing | Used between coats for extra smoothness |
Proper Sanding Techniques
- For areas with heavy damage or old paint layers, begin with an aggressive grit sandpaper such as 80.
- Work evenly across the panel to avoid creating low spots.
- As you remove layers of imperfections or level body filler, switch to medium grits like 180 and then finish with finer grits up to 400.
- This gradual approach prevents deep scratches that may show through the final coat.
- Wet sanding with ultra-fine grit paper (e.g., 1000+) provides a silky-smooth finish before applying the final coat of paint.
- It also reduces dust buildup during sanding by lubricating the surface.
- Uneven pressure while sanding can create dips or streaked surfaces.
- Use a sanding block wherever possible instead of hand-sanding directly.
- For most tasks, stick to straight-line motions to avoid introducing circular scratches that are harder to buff out later.
Tools That Can Help
Using appropriate tools enhances efficiency and accuracy during the sanding process: – Orbital Sanders: Ideal for large areas; they reduce manual effort but require controlled use. – Sanding Blocks: Excellent for edges and hard-to-reach areas; they ensure even pressure distribution. – Dual-Action Sanders (DA): Combine rotary motion with vibration; perfect for fine finishes without over-sanding.
Common Mistakes When Sanding
Avoid these pitfalls during this stage: – Skipping grit levels: Jumping directly from coarse to fine sandpaper creates uneven results. – Over-sanding one area: Leads to depressions that may require filler repair later. – Rushing wet-sanding: Failing to keep the surface wet risks scratching rather than smoothing.
By following these practices consistently, you can create a solid foundation that allows primers and paints to adhere seamlessly while ensuring a professional-grade finish every time.
Identifying and Repairing Surface Imperfections
One of the most critical steps in achieving a flawless auto paint repair is identifying and addressing surface imperfections. These issues, often invisible to the untrained eye, can significantly impact the final finish and durability of the paint job if not properly dealt with. Below, we’ll explore how to recognize these imperfections, common types of flaws, and techniques for repairing them effectively.
Recognizing Surface Imperfections
- Scratches and Swirl Marks: Fine lines or circular patterns caused by improper washing or sanding.
- Stone Chips: Small but deep imperfections caused by road debris or gravel hitting the vehicle’s surface.
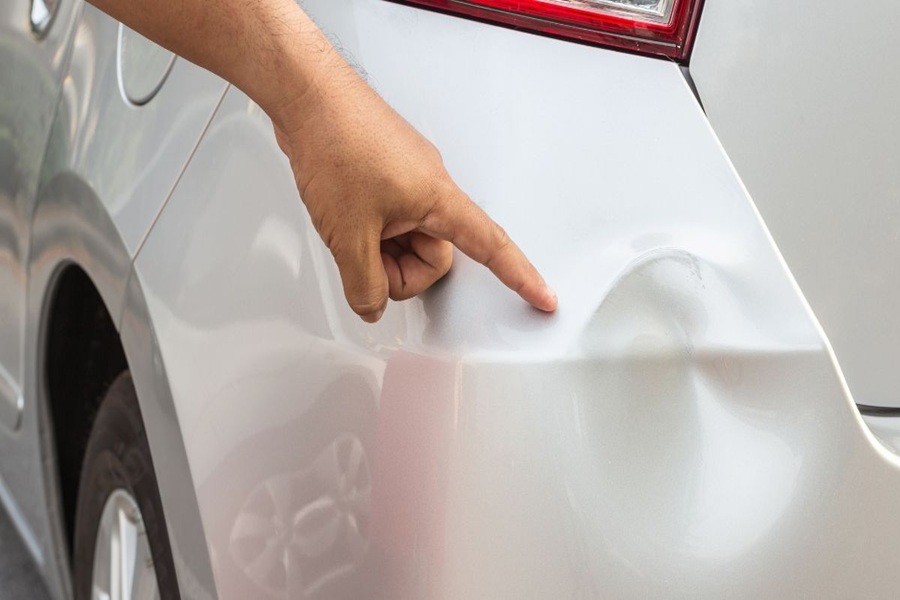
- Dents: Depressions on metal panels that disturb the smoothness of the surface.
- Rust Spots: Corrosion that eats into metal surfaces, often found in areas prone to moisture or salt exposure.
- Peeling Paint or Clear Coat: Areas where existing paint or clear coat has detached from the substrate due to poor adhesion.
Using tools such as magnifiers or specialized inspection lights can help identify even tiny defects.
Techniques for Surface Repairs
Once imperfections have been identified, it’s essential to use appropriate methods and materials to address them before proceeding with painting.
- For minor scratches: Use polishing compounds designed to remove light abrasions without damaging the surrounding paint layers.
- Deeper scratches may require filling with a specialized filler before sanding smooth.
- Clean out any debris in the chip using alcohol wipes.
- Apply touch-up primer followed by touch-up paint using a fine brush for precision.
- Lightly sand after drying if necessary for blending.
- Use suction-based dent pullers for shallow dents without affecting surrounding areas.
- For deeper dents, apply body filler after ensuring the dented area has been sanded clean; sand again after filler application until level.
- Sand away rust completely using coarse-grit sandpaper (or a wire wheel attachment).
- Treat cleaned areas with rust inhibitors to prevent future corrosion before applying fillers or primers.
- Remove loose paint by scraping and sanding down affected areas.
- Feather-sand edges around peeling spots to create a smooth transition between existing layers and exposed surfaces.
Using Tools Effectively
Imperfection Type | Essential Tools | Recommended Materials |
Scratches | Sandpaper (various grits), Polish Pads | Polishing Compound |
Stone Chips | Fine Brushes | Touch-Up Primer & Paint |
Dents | Dent Puller Kits, Sanding Blocks | Body Filler |
Rust Spots | Wire Brush/Wheel | Rust Inhibitor |
Peeling Paint | Scrapers, Orbital Sanders | Primer & High-Quality Paint Blend |
Importance of Thorough Repairs
Neglecting proper repair of these surface flaws can lead to long-term problems such as premature paint failure, uneven finishes, and increased susceptibility to environmental damage like moisture infiltration or UV degradation. By addressing every imperfection methodically before applying new coats of primer or paint, you ensure that your final results look professional and offer lasting protection against wear over time.
Focus on patience during this step—rushing through repairs often leads to subpar results that may require rework down the line. When done carefully and systematically, identifying and repairing surface imperfections lays a durable foundation for successful auto paint restoration projects.
Priming for Better Paint Adhesion
Priming is a fundamental step in auto paint repair that bridges the gap between the prepared surface and the final paint layers. Proper application of primer not only enhances paint adhesion but also provides an even base, improves durability, and prevents corrosion. Without this step, even the most skillful painting techniques could yield subpar results.
Why Primer Matters
Primer serves multiple critical functions in auto paint repair:
– Improved Adhesion: It creates a bond between the substrate (bare metal, filler, or old paint) and the new layer of paint, ensuring long-lasting results.
– Surface Leveling: Primer can fill small imperfections left after sanding, resulting in a smoother finish.
– Corrosion Resistance: For bare metal surfaces, primers act as a protective barrier against moisture and rust.
– Enhanced Color Accuracy: A consistent primer base helps achieve uniform color when topcoats are applied.
Types of Auto Primers
Primer Type | Features | Ideal Use Case |
Epoxy Primer | Excellent adhesion & corrosion resistance | Bare metals or areas prone to rust |
Urethane Primer | Durable & sandable | Building up layers for high-quality finishes |
Self-Etching Primer | Contains acid to etch into metals | Direct application to bare metal surfaces |
High-Build Primer | Fills small dents & imperfections | Smoothing uneven surfaces before topcoating |
Steps to Apply Primer Correctly
- Thoroughly clean and degrease the surface.
- Sand down old paint or rough areas to ensure better primer adhesion.
- Repair any dents or gouges as primers are not meant to fix deep imperfections.
- Match your primer type with both your substrate material and project goals.
- Check for compatibility with your chosen topcoat paint (e.g., waterborne vs solvent-based systems).
- Follow manufacturer instructions to mix primer components (if required).
- Use proper ratios when working with multi-part primers like epoxy or urethane.
- Use consistent spray patterns or brush strokes.
- Apply light coats rather than heavy layers to prevent runs or uneven curing.
- Give adequate time for each coat to dry before sanding or applying additional coats.
- Drying times may vary based on temperature, humidity, and primer type.
- Lightly sand with fine-grit sandpaper if multiple coats are needed.
- This helps remove minor texture irregularities while promoting strong adhesion.
Practical Tips for Effective Priming
- Always work in a clean environment free of dust and debris that could settle on wet primer.
- Consider using a tinted primer that closely matches your intended final color; this can reduce the number of topcoat layers required.
- Wear proper safety gear when working with primer products, as fumes can be harmful without adequate ventilation.
By investing time into proper priming techniques, you create a solid foundation that significantly impacts both aesthetics and longevity in auto paint repair projects—a step no professional should overlook.
How Proper Preparation Improves Long-Term Results
Proper surface preparation is the foundation of any successful auto paint repair project. While it may be tempting to rush through this stage, meticulous preparation delivers results that stand the test of time. High-quality surface prep directly impacts durability, aesthetics, and overall performance of the final paint job. Below is an in-depth look at how thorough preparation improves long-term results.
Enhanced Durability
- Resistance to environmental damage: Paint jobs last longer against exposure to UV rays, moisture, and temperature fluctuations when adhesion is optimized through proper preparation techniques.
- Minimized chipping or peeling: Quality preparation reduces weak spots where the paint might otherwise lift or separate over time.
Professional Finish
A well-prepared surface sets the stage for a flawless finish that looks professional and polished:
– Smooth texture: Sanding eliminates inconsistencies like scratches and roughness that can mar a fresh coat of paint.
– Even color application: Proper priming creates a uniform base layer, allowing paint to spread evenly without blotches or variations in color tone.
Cost-Effectiveness Over Time
Failing to prepare surfaces correctly often leads to premature failures in the paintwork that require costly repairs down the road. Investing time upfront saves money by reducing:
– The likelihood of needing touch-ups or repaints due to peeling or flaking issues. – The cost associated with addressing rust or corrosion that develops from improper cleaning.
Protection Against Corrosion
Surface preparation also involves repairing dents or chips where metal may be exposed. Neglecting these areas can lead to oxidation and rust formation beneath the layers of paint. By taking proper steps—such as filling imperfections and applying primers with rust inhibitors—you protect your vehicle from structural damage caused by corrosion.
Step | Benefit | Long-Term Impact |
Cleaning & Degreasing | Removes contaminants | Prevents poor adhesion |
Sanding | Smooths out surface imperfections | Ensures uniform finish |
Priming | Promotes better adhesion | Protects base material from rust |
Increased Resale Value
A properly prepared and painted car surface significantly boosts resale value by presenting an attractive appearance free from flaws such as uneven textures or faded patches caused by poor prep work.
Practical Tips for Long-Term Results
To ensure consistent outcomes in your auto painting projects: 1. Always invest in high-quality materials such as primers, sandpapers (of varying grits), and cleaning products tailored for automotive use. 2. Allocate sufficient time for each step; rushing through preparation can leave gaps that compromise durability. 3. Inspect each layer carefully before moving on—whether it’s after cleaning, sanding, filling imperfections, or priming—to avoid missing critical issues.
By emphasizing meticulous preparation at every phase of auto painting repair, you not only achieve immediate visual appeal but also enjoy long-lasting protection and performance for years ahead.
How Proper Preparation Improves Long-Term Results
Proper surface preparation is essential to ensure the long-term durability and quality of auto paint repair. By dedicating time to thoroughly prepare the surface before applying paint, you can reduce the risk of common issues like cracking, peeling, or fading while also extending the lifespan of the repair. This section explores how proper preparation directly impacts results and why it’s a crucial investment in time and effort.
Prevents Paint Peeling and Cracking
Failure to prepare a surface properly often leads to poor paint adhesion. This can cause peeling or cracking over time, especially when exposed to harsh weather conditions. Proper preparation ensures:
– Better Adhesion: Cleaning, sanding, and priming create an even base for paint to bond securely with the surface.
– Resistance to Moisture: Removing contaminants like grease or rust prevents moisture from being trapped under the paint layer, reducing susceptibility to bubbling or peeling.
Improves Aesthetic Finish
A well-prepared surface contributes significantly to achieving a flawless and professional-looking finish. Skipping or rushing steps like sanding or filling imperfections can result in visible defects such as uneven textures or noticeable scratches once the paint is applied. Key benefits include:
– Smoother Surface: Sanding eliminates rough patches for a sleek foundation before painting.
– Consistency in Color: Primers prevent uneven absorption of paint while enhancing color uniformity across the surface.
Enhances Durability Under Stress
Painted surfaces on vehicles are regularly exposed to UV rays, fluctuating temperatures, road debris, and other environmental stressors. Without proper preparation, these factors can quickly wear down an improperly repaired area. Surface prep measures that boost durability include:
– Applying quality primers that shield against corrosion and heat damage.
– Repairing dents or cracks beforehand so that stress doesn’t concentrate on weak points after repainting.
Preparation Step | Impact on Durability | Example Benefit |
Cleaning & Degreasing | Prevents contaminants from undermining adhesion | Paint adheres securely with no bubbling |
Sanding | Reduces high points that cause weak spots | Smoother finish resists scratching |
Priming | Adds a protective barrier under topcoat | Slows down rust formation over time |
Reduces Costly Repairs in Future
Neglecting surface prep may save time initially but creates problems requiring additional repairs later—costly both in terms of money and frustration. For example:
– Peeling paint often requires stripping off layers completely before repainting. – Rust spots left untreated during prep can spread beneath new coatings, compromising structural integrity.
Investing effort upfront prevents escalating expenses and ensures longer-lasting results.
Proper preparation not only enhances immediate outcomes but also proves invaluable for maintaining vehicle appearance and performance over time. Ensuring each step is carried out diligently leads to better protection against wear-and-tear while delivering lasting satisfaction with your auto paint repair projects.
Recent Posts

How to Spot Hidden Damage After a Car Accident
Why Hidden Damage Is Common After Collisions Car accidents, whether minor fender benders or major collisions, can leave behind damage that isn’t immediately visible to the naked eye. This hidden damage can pose serious risks if left unchecked, not only affecting the safety of your vehicle but also potentially leading…

How Frame Alignment Restores Vehicle Safety
What Is Frame Alignment in Auto Body Repair Frame alignment is a critical process in auto body repair that ensures the structural integrity of a vehicle after it has been involved in a collision, sustained damage, or undergone any form of impact that affects its frame. Essentially, frame alignment is…
How to Know If Your Bumper Can Be Repaired
Common Types of Bumper Damage Explained Bumpers are designed to absorb and distribute impact energy during collisions, making them a critical component of vehicle safety. Due to their role, bumpers are often the first part of the car to sustain damage in an accident. Understanding the common types of bumper…