Touch-Up Paint: Complete Application Guide
When Is Touch-Up Paint a Good Solution
Touch-up paint can be an effective and economical way to restore the appearance of surfaces that have suffered minor damage. However, it’s not always the right solution for every situation. Understanding when touch-up paint is appropriate can save you time, effort, and money while achieving professional-looking results.
Situations Where Touch-Up Paint Works Well
- Minor Scratches and Scuffs
For light scratches or scuffs that don’t penetrate deeply into the material, touch-up paint provides a quick fix without requiring a full repaint. - Chips in Painted Surfaces
Small chips caused by impacts (e.g., from stones or tools) can often be filled in with touch-up paint to restore the surface’s uniform appearance. - Fading or Discoloration
If certain spots on a surface have faded due to sunlight or wear over time, touch-up paint can help blend these areas with the rest of the surface. - Localized Damage
When most of the painted surface is still in excellent condition, but specific areas show signs of damage, touch-up painting prevents the need for completely repainting larger sections.
Benefits of Using Touch-Up Paint
- Cost-Effective
Compared to hiring professionals or repainting an entire area, using touch-up paint is far more affordable. It also reduces waste by targeting only damaged spots. - Time-Saving
A small repair job using touch-up paint takes significantly less time than prepping and repainting large sections. - Easy to Use
Modern formulations often come with user-friendly applicators like brushes or pens that make precision repairs simple, even for beginners. - Helps Maintain Property Value
Regularly touching up minor imperfections keeps surfaces looking their best, which is especially important for those planning to sell their property or vehicle.
Factors to Consider Before Using Touch-Up Paint
Factor | Questions To Ask Yourself |
Size of Damage | Is it small enough to repair easily? |
Surface Condition | Is the surrounding area clean and intact? |
Surface Type | Does the material accept touch-up paint well? |
Color Match | Can you get an accurate color match? |
Longevity Needs | Will this repair last long enough? |
If any of these factors point toward potential challenges—for instance, if the damage covers too large an area—other solutions like professional refinishing may be more appropriate.
Limitations of Touch-Up Paint
- Not Suitable for Large Areas – If damage spans significant portions of a surface (e.g., full panels on cars), blending new paint seamlessly becomes difficult.
- Color Matching Challenges – Even slight differences between existing colors and new paints may stand out in prominent places.
- Temporary Fixes Only in Some Cases – For deep gouges or cracks that compromise structural integrity, this method won’t offer long-term results.
Summary Table: When It’s Appropriate
Situation | Use Touch-Up Paint? |
Small chips/scratches | Yes! |
Faded spots | Yes |
Large-scale peeling | No |
Deep structural damage | No |
By understanding when and where this method works best, you can ensure optimal results while preserving both aesthetics and functionality.
Essential Tools and Supplies
When working with touch-up paint, having the right tools and supplies on hand is crucial to achieving a professional-looking finish. Each item serves a specific purpose, ensuring precision, efficiency, and a seamless repair. Below is a comprehensive guide to the essential tools and supplies you’ll need for your touch-up paint project.
Paint Selection
- Touch-Up Paint Matching: Always confirm that the paint matches the color code of your surface or vehicle. This ensures consistency across the repaired area.
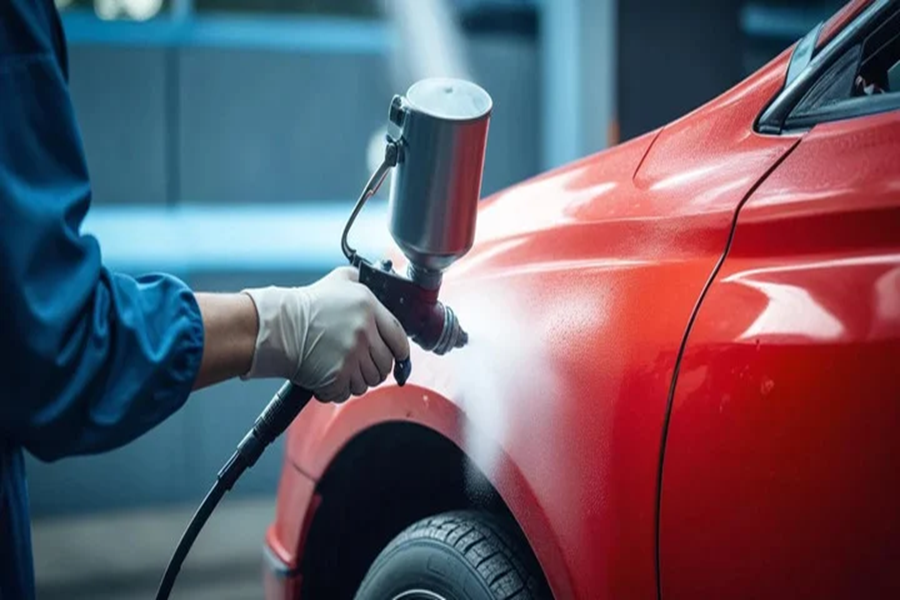
- Application Type: Decide between spray cans, brush-on bottles, or paint pens depending on the scale of the damage and your comfort level with application.
Surface Preparation Tools
Proper preparation is key to ensure the touch-up paint adheres well to the surface: – Sandpaper: – 2000-grit or finer for smoothing down scratches or imperfections. – Coarser grit (e.g., 1000-grit) for heavy damage requiring deeper removal. – Masking Tape: Use tape to protect surrounding areas from accidental paint coverage. – Lint-Free Cloths: Ideal for cleaning dust and debris from surfaces without leaving residue. – Rubbing Alcohol/Pre-Paint Cleaner: Removes grease, wax, or contaminants that could prevent proper adhesion.
Application Tools
For precise application of touch-up paint: – Fine-Tip Brushes: – Useful for small chips and highly detailed areas where precision is critical. – Paint Pen Applicators: – Great for minor scratches or thin lines of damage. – Spray Can Nozzle Extensions (Optional): Helps improve precision when using aerosol paints on larger areas.
Finishing Materials
A smooth finish enhances the overall appearance of your repair: – Clear Coat Sealant: – Protects paintwork while adding a glossy or matte finish to match existing surfaces.
– Polishing Compound/Wax: Buffs out imperfections after painting to create a seamless blend with surrounding areas.
Tool/Supply | Purpose |
Touch-Up Paint | Matches original surface color |
Sandpaper | Evens out damaged areas before painting |
Masking Tape | Prevents overspray |
Lint-Free Cloth | Cleans surface debris |
Rubbing Alcohol | Degreases/prepares surface for adhesion |
Fine-Tip Brushes | Allows detailed paint application |
Clear Coat | Seals and protects repaired area |
Optional Supplies
These additional tools can enhance results but are not always necessary depending on your project’s complexity: – Primer: Use this if bare metal or material is exposed, as it helps create a solid base layer for proper adhesion. – Microfiber Towels: Ideal for buffing without scratching once repairs are complete. – Heat Gun/Hair Dryer: Speeds up drying time in colder environments.
Safety Gear
Always prioritize safety during any painting process: – Nitrile gloves to protect skin from chemicals in paints and solvents. – A mask or respirator if working with spray paints in an enclosed area.
By equipping yourself with these tools and supplies before starting your touch-up project, you’ll save time and avoid unexpected interruptions during application. Proper preparation ensures you can focus entirely on perfecting your repair technique while maintaining peace of mind about durability.
Step-by-Step Touch-Up Paint Application
Applying touch-up paint requires care and precision to achieve a seamless finish. Whether you’re fixing a small scratch or a minor chip, following proper steps ensures the longevity and appearance of the repair. Below is a detailed guide to help you apply touch-up paint effectively.
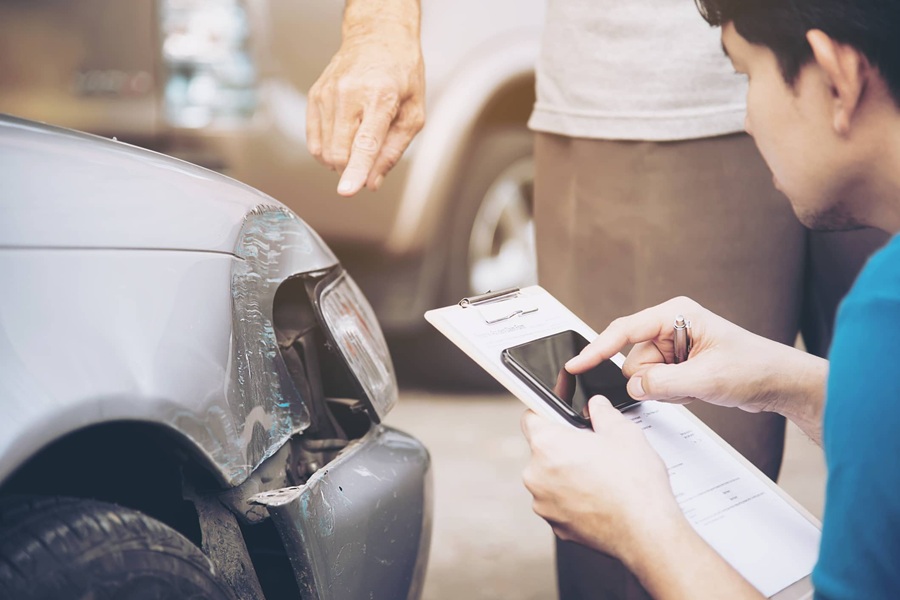
1. Assess the Damage
Before beginning, evaluate the extent of the damage:
– Small Chips or Scratches: Suitable for touch-up paint if they are shallow and localized.
– Deep Gouges or Extensive Damage: May require professional repair or additional preparation such as filling or sanding.
2. Gather Materials
Having all necessary tools at hand will streamline your process. Here’s what you’ll need:
– Touch-up paint that matches the original color (verified using your vehicle’s color code).
– Fine-grit sandpaper (e.g., 600-1000 grit) for smoothing rough edges around chips/scratches.
– Primer (if bare metal or plastic is exposed).
– Microfiber cloths for cleaning and buffing.
– Rubbing alcohol or an appropriate degreaser to clean surfaces before painting.
– Applicators such as brushes, toothpicks, or specialized pens included with your touch-up kit.
Tool/Supply | Purpose |
Touch-Up Paint | Matches existing surface color |
Sandpaper (600–1000 grit) | Smoothens rough edges |
Primer | Prepares exposed surfaces |
3. Prepare the Surface
Preparation is key for optimal results:
1. Wash the area thoroughly with soap and water to remove any dust, dirt, and debris. Dry it completely with a lint-free cloth. 2. Clean the damaged section with rubbing alcohol to eliminate waxes, oils, and residues that could interfere with adhesion. 3. Lightly sand around chips or scratches to smooth out uneven edges without over-sanding.
4. Apply Primer (if Necessary)
If bare metal or plastic is visible due to damage:
– Use primer sparingly, as excess can affect final results. – Allow it to dry completely (refer to product instructions). Priming ensures better adhesion of touch-up paint.
5. Apply Touch-Up Paint
Precision during application is essential for blending repairs into surrounding surfaces:
1. Shake the touch-up paint bottle well before use. 2. Using an applicator like a fine brush or toothpick, apply thin layers of paint directly onto scratches/chips without overfilling them. 3. Let each layer dry fully before applying additional coats; multiple thin coats typically yield better results than one thick coat. 4. Avoid spreading paint beyond damaged areas.
6. Finish With Clear Coat (Optional)
For extra protection and shine:
1. Once the touch-up paint dries completely, apply a clear coat using smooth strokes that align with surrounding finishes. 2. This step helps seal in repairs while restoring glossiness.
7. Buff & Polish Lightly (After Drying)
Depending on repair size/type:
– Use polishing compound sparingly on repaired sections after curing time recommended by product instructions has passed (often 24–48 hours). This creates an even blend between repaired spots and original surfaces.
Practical Tips for Best Results
To ensure success during your application process: – Perform repairs in controlled environments free from moisture/dust. – Avoid direct sunlight during application—it may cause uneven drying.
Touch-Up Paint: Do’s and Don’ts
When working with touch-up paint, there are clear practices that can make the process smoother, as well as common mistakes that should be avoided. Following these do’s and don’ts ensures a professional finish while preventing further damage or an uneven look. Below is a comprehensive guide on best practices and pitfalls to avoid when applying touch-up paint.
Do’s: Best Practices for Successful Application
- Clean the area thoroughly to remove dirt, grease, or wax. Use mild soap or an automotive cleaner to ensure the surface is free of contaminants.
- Sand any rough edges around chips or scratches with fine-grit sandpaper to create a smooth surface for adhesion.
- Dry the area completely before applying paint to prevent moisture interference.
- Use your vehicle’s paint code (usually found on a label inside the driver’s door or in your owner’s manual) to ensure you get the exact color match.
- Test the touch-up paint on an inconspicuous area first to confirm it matches and blends seamlessly.
- Build up layers gradually rather than applying all at once. Thin coats dry faster and reduce the risk of dripping or uneven texture.
- Use a steady hand to work precisely within the damaged area without overlapping onto undamaged sections.
- Once the paint has dried completely, gently buff it with polishing compound for a smooth finish.
- Apply a clear coat for added protection and shine, ensuring it blends evenly with surrounding areas.
Don’ts: Mistakes to Avoid
- Don’t Skip Surface Preparation:
Failing to clean or sand properly can lead to poor adhesion, resulting in peeling or flaking over time. Investing time in preparation avoids future issues. - Avoid Rushing Through Drying Times: Allow each coat of touch-up paint sufficient time to cure before proceeding with additional layers. Rushing through this step may cause smudging or uneven finishes.
- Don’t Overload Your Brush/Pen: Applying too much paint at once can lead to drips, clumps, or an overly thick application that stands out against surrounding areas.
Common Errors | Why It Happens | How To Prevent It |
Uneven Color | Incorrect color match | Use exact factory color codes |
Rough Finish | Skipped sanding step | Smooth edges before painting |
Peeling Paint | Poor cleaning/prep | Fully clean & remove wax residue |
- Never Ignore Larger Damage Areas: Touch-up paint works best on small scratches, chips, and imperfections. For broader damage like extensive dents or rust spots, seek professional repair instead of relying solely on touch-up solutions.
Key Tips for Success
- Work in a well-lit environment so you can clearly see how well the paint is blending.
- Maintain consistent temperatures during application—extreme cold or heat can affect drying times and overall results.
- Store unused touch-up paint properly by sealing it tightly and keeping it in a cool, dry place for future use.
By adhering closely to these do’s and don’ts, you’ll achieve better results while extending your vehicle’s appearance and preventing further wear over time.
When Not to Use Touch-Up Paint
While touch-up paint can be an effective way to restore minor blemishes on surfaces, it’s not always the ideal solution for every situation. Applying touch-up paint inappropriately or under unsuitable circumstances can lead to unsatisfactory results or even further damage. Below are key scenarios where touch-up paint should be avoided, as well as alternative solutions to consider.
Extensive Damage or Large Surface Areas
- Large Scratches or Dents: For significant scratches, dents, or gouges in a surface, touch-up paint often fails to blend seamlessly. These issues typically require professional repair techniques such as sanding, filler application, and refinishing.
- Peeling Paint: If the existing paint is peeling or flaking off the surface, applying touch-up paint can exacerbate the issue rather than resolving it. Ensure the base layers are stable before considering any repainting efforts.
Color Matching Challenges
- Severe Color Discrepancy: If an exact color match cannot be achieved—whether due to fading over time or difficulty replicating a unique hue—touch-up paint can stand out more than the actual flaw. In this case:
- Consider repainting a larger section of the area to create uniformity.
- Seek professional color-matching services if precision is crucial.
High-Wear Areas
- Frequent Contact Surfaces: Touch-up paints are generally less durable than factory-applied finishes and may wear down quickly on surfaces that experience frequent handling, such as door handles or tabletops.
- Opt for a full professional repaint with industrial-grade coatings for better durability in high-use areas.
Poor Surface Preparation
Skipping proper prep work before applying touch-up paint can render your efforts ineffective: – Surfaces with dirt, grease, rust, or moisture will not allow the new layer of paint to adhere properly. – In cases where preparation seems overwhelming (e.g., removing deep rust), consult a specialist instead of proceeding with DIY touch-ups.
Issue | Recommended Alternative |
Large scratches/dents | Professional repair (sanding/filling) |
Peeling/flaking | Strip old layers; apply primer & repaint entire area |
Severe color mismatch | Repaint larger areas; seek expert matching |
High-wear surfaces | Apply professional-grade finish |
Situations Where Aesthetic Perfection Is Critical
In cases where an absolutely flawless appearance is required—such as high-end vehicles, custom furniture pieces, or luxury interiors—DIY touch-up may fall short of expectations. Minor imperfections in application technique can become visible under harsh lighting or close inspection. Hiring professionals ensures precision and avoids compromising overall aesthetics.
By recognizing these scenarios and understanding when not to rely on touch-up paint alone, you can make more informed decisions about how best to address surface imperfections while maintaining quality and durability.
When Not to Use Touch-Up Paint
Touch-up paint can be a highly effective solution for repairing minor imperfections, but it’s not always the best approach in every situation. Misusing touch-up paint or applying it in situations that exceed its capabilities can lead to unsatisfactory results and even exacerbate the damage. Below are key scenarios where using touch-up paint is not recommended.
1. Extensive Damage or Large Areas
Touch-up paint is primarily designed for small imperfections, such as light scratches, scuffs, or tiny chips. Attempting to use it on larger damaged areas often leads to uneven application and poor aesthetic results.
- Dents
- Deep gouges
- Large peeling areas of paint
For larger surfaces or significant damage, professional repainting or panel replacement may be more appropriate.
2. When Surface Preparation Is Not Possible
- Avoid proceeding with touch-up paint as unprepared surfaces will prevent proper adhesion.
- Dust, grease, or rust left on the surface can cause peeling or flaking after application.
Instead, wait until sufficient preparation can be done or consult a professional for assistance.
3. Faded Paint Colors
Vehicles and painted objects exposed to sunlight over time may experience fading due to UV rays. Using fresh touch-up paint on a faded surface often creates noticeable mismatches in color tone.
- Older vehicles with visible oxidation of paint
- Items with uneven fading across their surface
In cases like these, restoring the original faded color through polishing or repainting the entire surface is often preferable.
4. Severe Rust Areas
If rust has penetrated beneath the paint layers and into the base material (such as metal), applying touch-up paint directly over rust will not resolve the issue. Rust spreads underneath coatings and can compromise structural integrity over time.
- Remove all visible rust using sandpaper or a wire brush.
- Apply a rust converter or sealant to inhibit further corrosion.
For extensive rust issues that require more than spot treatment, consult experts who specialize in rust repair before applying any new coatings.
5. High-Stress Areas That Require Durability
Some surfaces experience significant wear and tear due to environmental factors (e.g., heavy friction zones). Touch-up paints may not withstand high-stress conditions such as extreme heat exposure, freezing temperatures, or continuous movement.
- Edges of doors prone to constant opening/closing impacts
- Surfaces exposed continuously to water spray (e.g., lower panels near tires)
Consider specialized coatings designed for durability if addressing these areas is necessary.
Comparative Table: Suitable vs Unsuitable Scenarios
Scenario | Touch-Up Paint? | Alternative Solutions |
Small chips & scratches | ✅ Yes | N/A |
Faded large panels | 🚫 No | Professional repainting |
Rusty spots | 🚫 No | Sanding + Rust sealant |
Heavily dented areas | 🚫 No | Panel repair/replacement |
High-friction zones | 🚫 No | Durable protective coating |
Understanding when not to use touch-up paint ensures that your efforts yield long-lasting results while maintaining the integrity of your project—whether it’s your car’s finish, furniture pieces, or any other painted surface needing care.
When Not to Use Touch-Up Paint
Touch-up paint is a valuable tool for addressing minor imperfections, but it’s not a universal solution. There are specific circumstances where it may not be effective or appropriate, and understanding these scenarios can save you time, effort, and frustration. Below, we’ll explore when touch-up paint is not the best option and why.
Extensive Damage or Large Areas
- Color mismatch: Even with a perfectly matched color code, large areas are harder to blend without visible differences in texture or finish.
- Inconsistent finish: Touch-up paint is ideal for small chips or scratches but may result in uneven results on larger surfaces compared to professional refinishing techniques.
Solution: For larger areas of damage, consider professional repainting services or complete reapplication of the surface coating for uniformity.
Severe Structural Issues
Touch-up paint cannot address structural problems such as deep dents, cracks, rust spots that have compromised metal integrity, or peeling layers. Applying paint over these issues can lead to poor adhesion and worsening damage over time.
- Deep scratches that expose primer or bare material beneath.
- Rust spots spreading under existing coats of paint.
- Cracks that extend beyond surface depth into underlying materials.
Solution: Repair the structural damage first through sanding, filling compounds (for cracks), rust removal treatments, or other preparatory techniques before considering any painting work.
High-End Finishes Requiring Precision
On high-end finishes (e.g., luxury automotive paints or specialty coatings), improper touch-up attempts can detract from the overall aesthetic quality. Some specialty finishes—like metallics or pearlescents—are particularly difficult to match accurately with off-the-shelf products due to their complex formulae and light-reflective properties.
- Avoid DIY methods unless you’re confident in your matching skills and tools.
- Seek assistance from specialists who have experience handling exact matches for luxury finishes.
Environmental Factors That Impact Results
- Extreme heat or cold impacts how paint cures.
- High humidity can prevent proper adhesion and lead to bubbling.
- Dust, oil residues, or dirt on the damaged area reduce bonding strength between new paint layers and the substrate below.
- Improper ventilation during application could lead to patchy finishes for solvent-evaporating paints like automotive varieties.
Before starting any project outdoors—or in spaces prone to contaminants—ensure optimal conditions by cleaning thoroughly and working within recommended temperature/humidity ranges as outlined by product instructions.
Surfaces With Worn Clear Coats
In situations where clear coats (protective outermost layer applied on painted surfaces) show visible wear like peeling edges/crazing patterns—it becomes increasingly difficult achieving aesthetically acceptable results purely applying localized pigment only underneath existing degraded film remnants above such regions already weakened entirely repaint entire clear-coat-dependent sections instead ensure cohesive blending longer durability similar scenarios arise whenever multi-layered designs originally involved.
Recent Posts
The Complete Guide to Auto Paint Repair and Refinishing
Understanding Auto Paint Damage and Common Causes Auto paint serves a dual purpose: it enhances the aesthetic appeal of your vehicle while protecting its surface from harmful environmental factors. Over time, however, this layer of protection can wear down due to various types of damage. Understanding the common causes of…
Why a Lifetime Warranty Matters for Auto Body Repairs
What Does a Lifetime Warranty on Auto Body Repairs Mean? A lifetime warranty on auto body repairs is more than just a reassuring promise—it’s a testament to the quality, skill, and confidence of the repair shop standing behind their work. This type of warranty reflects a commitment to delivering results…
How to Read Auto Body Shop Reviews the Right Way
Why Online Reviews Matter When Choosing a Body Shop When searching for an auto body shop, online reviews have become a cornerstone in the decision-making process. They provide first-hand accounts of customers’ experiences, offering invaluable insights into the quality of service, professionalism, and overall reliability of a business. In today’s…