Understanding Bumper Sensors and Their Role
By understanding how these sensors function and their importance, drivers can appreciate their role in maintaining a safe driving experience.
Bumper sensors are devices installed in the front or rear bumpers of a vehicle. They use various technologies such as ultrasonic waves, radar, or electromagnetic fields to detect objects, obstacles, or even pedestrians in close proximity to the car.
- Parking Assistance Systems: Help drivers navigate tight parking spaces by providing proximity warnings.
- Collision Warning Systems: Alert drivers of potential collisions with nearby objects or vehicles.
- Automated Braking Systems: In some cases, initiate braking to avoid an accident if the driver does not respond quickly enough.
Why Are They Important?
Modern safety protocols increasingly rely on bumper sensors for accident prevention and driver convenience.
- Enhanced Safety: These sensors significantly reduce the likelihood of collisions by alerting drivers or taking automated actions when obstacles are detected.
- Reduced Repair Costs: With early warnings about obstacles, unnecessary scratches or dents from misjudged distances can be avoided.
- Improved Driving Experience: By taking over some detection responsibilities from the driver, these systems make driving less stressful especially in crowded urban environments.
- Critical for ADAS (Advanced Driver Assistance Systems): Many vehicles with advanced features like lane departure warning or self-parking rely heavily on accurate bumper sensor data.
Integration with Other Systems
Bumper sensors work seamlessly with other vehicle systems to provide a comprehensive safety net:
- Integration with cameras for 360-degree views around the vehicle.
- Connection to onboard computers for issuing audio/visual alerts.
- Coordination with braking systems for automatic emergency stops.
Maintaining Your Bumper Sensors
Proper maintenance ensures that bumper sensors continue functioning effectively:
- Regularly clean your bumpers to prevent dirt or debris from blocking sensor signals.
- Inspect after minor accidents; even small impacts may offset sensor alignment.
- Test system functionality periodically using onboard diagnostics (where available) or during scheduled automotive servicing.
Understanding your bumper sensors is essential not only for safety but also for ensuring your investment in advanced vehicular technology pays off over time through reliable performance.
Signs a Bumper Sensor May Be Damaged
Bumper sensors play a critical role in modern vehicles by detecting objects and aiding in parking, lane changes, and collision prevention. However, like any component, these sensors can develop issues over time. Recognizing the warning signs of a damaged bumper sensor is essential to ensure your vehicle’s safety systems function effectively.
Common Symptoms of a Faulty Bumper Sensor
- Inconsistent Range Detection: A damaged sensor might have trouble detecting objects at its usual range, either by detecting them too late or prematurely.
- Failure to Engage Assistance Features: If features like automatic braking, parking assist, or blind spot detection fail to activate properly, this could point to a faulty bumper sensor.
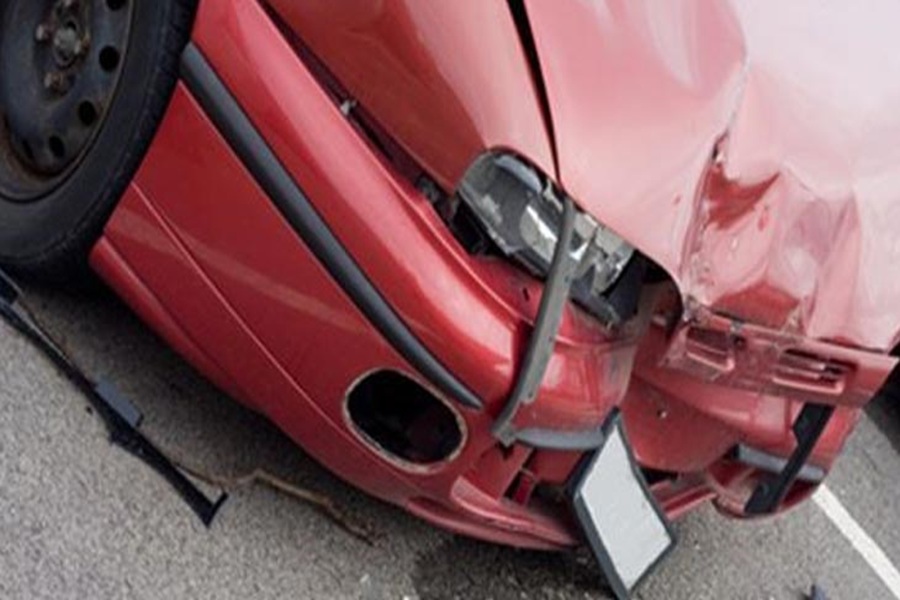
- Physical Damage: Visible cracks, dents, scratches, or misalignment of the bumper where the sensors are located can indicate damage.
How These Issues Impact Safety
Driving with defective bumper sensors can compromise your safety and increase the risk of accidents. These systems are integral for situational awareness during parking and driving in tight spaces.
- Reduced ability to detect nearby obstacles.
- Higher likelihood of collisions while parking or backing up.
Troubleshooting Tips for Drivers
- Restart Your Vehicle’s System
In some cases, restarting your car may reset minor system glitches causing false alerts. - Inspect for Physical Damage
Check if there are any visible dents or scratches on the bumper near the sensor area that could indicate damage from an impact. - Monitor for Consistent Issues
If problems persist after cleaning and resetting, it’s likely that deeper electrical or hardware issues exist within the system.
When DIY Fixes Aren’t Enough
While cleaning and inspecting might temporarily address minor concerns (e. g. , dirt-related interference), persistent issues usually require professional attention. A qualified technician will conduct specialized diagnostic tests using advanced tools such as scanning software to pinpoint whether a specific sensor is damaged or if there’s an issue with wiring or calibration.
By staying vigilant about these warning signs and taking prompt action when needed, drivers can maintain their vehicle’s safety features in top condition without compromising performance on the road.
What Causes Bumper Sensor Damage
Bumper sensors are vital safety components in modern vehicles, designed to assist with parking, collision avoidance, and overall driving awareness. However, like any electronic or mechanical component, they are susceptible to damage from a variety of sources. Understanding these causes can help drivers take preventative steps and maintain the functionality of their bumper sensors.
Common Causes of Bumper Sensor Damage
- Minor collisions or fender benders can misalign or physically damage the sensors embedded in the bumper.
- Hitting objects while parking, such as curbs or shopping carts, can result in cracks or scratches that impair sensor functionality.
- Prolonged exposure to extreme weather conditions (e. g. , heavy rain, snow, or direct sunlight) can degrade sensor components over time.
- Road salt used during winter months can corrode the sensor housing and electrical connections.
- Mud, dust, and other debris can block the sensor’s lens, affecting its ability to send or receive signals properly. This is particularly common for vehicles driven off-road or in dusty environments.
- Wiring problems such as frayed wires or loose connections may disrupt the communication between the bumper sensor and a vehicle’s computer system.
- Power surges within the car’s electrical system could lead to short circuits that impair sensor functionality.
- Using high-pressure water jets too close to the bumper could damage sensitive sensors.
- Certain cleaning chemicals may corrode plastic housing around sensors if not rinsed thoroughly after application.
- While less common, manufacturing defects might cause premature sensor failure.
- Normal wear and tear from daily use often leads to reduced effectiveness over several years.
Preventative Measures
- Regularly clean your vehicle using appropriate cleaning methods that are gentle on sensors.
- Avoid parking too close to obstacles where possible; use manual checks if unsure of clearances.
- Conduct periodic visual inspections of your bumper for signs of physical damage or debris buildup.
- Invest in protective coatings for your car if you frequently drive in harsh environmental conditions (e. g. , areas with salt-heavy roads).
Table: Key Causes vs Preventative Actions
| Cause | Preventative Action |
| Physical Impact | Be cautious when parking; avoid collisions with curbs/obstacles |
| Environmental Factors | Park in shaded areas; rinse off road salt regularly |
| Dirt/Debris Accumulation | Clean bumpers gently but consistently |
| Electrical Issues | Inspect wiring during routine maintenance |
| Improper Cleaning | Avoid high-pressure washers near sensitive areas |
| Wear Over Time | Replace parts as recommended by manufacturer guidelines |
How Technicians Inspect and Diagnose Sensor Problems
Diagnosing bumper sensor issues requires a systematic approach to identify the root of the problem and determine whether repair or replacement is necessary. Automotive technicians use specialized tools, diagnostic equipment, and their expertise to thoroughly evaluate the state of your bumper sensors.
1.Visual Inspection
Technicians start with a physical examination of the bumper area to look for visible damage or obstructions.
- Checking for cracks, dents, or misalignment:Physical impacts on the bumper may directly affect sensor functionality.
- Inspecting for dirt or debris buildup:Dust, mud, snow, or other debris can block sensors and cause them to malfunction.
- Examining wiring connections:Loose, frayed, or corroded wires can disrupt communication between the sensor and vehicle systems.
2.Diagnostic Scanning
Technicians use diagnostic tools to:
- Retrieve trouble codes related to parking assist or collision avoidance systems.
- Pinpoint which specific sensor is faulty based on error messages (e. g. , “rear-left ultrasonic sensor malfunction”).
- Cross-reference diagnostic codes with manufacturer guidelines for accuracy.
3.Functional Testing
To confirm whether a sensor is functioning properly, technicians perform practical tests such as:
- Using an object to simulate proximity: Placing an object near each individual sensor can help determine if the system responds appropriately.
- Listening for audible signals: Sensors often emit faint clicking sounds when active; silence may indicate failure.
- Monitoring dashboard indicators: If warning lights fail to activate during testing, it signals further electrical issues.
4.Electrical Testing
If physical inspection and functional testing do not fully reveal the issue, electrical testing becomes essential. Key steps include:
- Testing voltage levels: Technicians ensure that appropriate power is being supplied to each sensor.
- Checking signal output: Properly functioning sensors send specific electromagnetic signals; irregular patterns suggest damage.
- Inspecting grounding points: Poor grounding can lead to intermittent malfunctions in system performance.
| Diagnostic Step | Tools Used | Purpose |
| Visual Inspection | Flashlight, magnifying glasses | Identify external damage or obstruction |
| Diagnostic Scanning | OBD-II scanner | Retrieve error codes |
| Functional Testing | Test objects (e.g., small boxes) | Verify real-world response |
| Electrical Testing | Multimeter | Check power supply & signal integrity |
5.Advanced Techniques
In complex cases where basic diagnostics do not yield clear results:
- Technicians may use more advanced methods like:
- Performing radar alignment checks (for radar-based sensors).
- Using thermal imaging devices to detect overheating components within ultrasonic modules.
Avoid DIY Misdiagnosis
While some drivers may attempt self-diagnosis using online guides or inexpensive scanners, these approaches often miss subtle issues such as faulty wiring harnesses or miscalibrations post-impact. A professional inspection ensures accuracy while preventing unnecessary expenses on incorrect replacements.
By understanding how technicians diagnose problems step by step from visual inspections through advanced techniques ensures awareness
Bumper Sensor Repair
Both options have their pros and cons, and the decision largely depends on various factors such as the extent of damage, cost-effectiveness, and long-term reliability. Below, we’ll explore these considerations to help you make an informed choice.
Factors to Consider
- If the bumper sensor has minor issues such as loose wiring, dirt buildup, or software glitches, a repair may be sufficient.
- For sensors that are cracked, corroded, or completely non-functional due to impact damage, replacement is usually necessary.
- Older sensors may not function optimally even after repairs due to wear and tear over time. In such cases, replacing them ensures better long-term performance.
- Newer sensors might still be under warranty; if so, replacement could be covered by the manufacturer.
- Repairs can often be more affordable than replacements in the short term.
- However, consider the long-term implications: multiple repairs over time could end up costing more than a one-time replacement.
- If your current sensor technology is outdated or incompatible with newer systems, upgrading via replacement is often recommended.
Benefits of Repair
- Cost Savings: Minor issues like cleaning debris off sensors or repairing loose connectors can restore functionality without requiring significant financial investment.
- Quicker Resolution: Repairs are typically faster than replacements since they don’t involve sourcing new parts.
- Environmental Impact: Opting for repairs reduces electronic waste and aligns with sustainable practices.
Benefits of Replacement
- Reliability & Accuracy: A new sensor ensures optimal performance and minimizes future breakdown risks.
- Warranty Protection: Most new sensors come with warranties that cover defects for a certain period.
- Enhanced Safety Features: Modern replacements may offer improved sensitivity and compatibility with cutting-edge safety technologies.
When Should You Choose One Over the Other?
- Opt for repair when:
- The issue is minor (e. g. , dirt contamination or loose wiring).
- The cost difference between repair and replacement is significant.
- The existing sensor is relatively new and compatible with your vehicle’s technology requirements.
- Opt for replacement when:
- The sensor has suffered physical damage (e. g. , cracks from an accident).
- Repairs have been attempted before but were ineffective.
- Upgrading to a newer model improves safety features or overall system integration.
Practical Tips for Maintenance Post Repair/Replacement
- Regularly clean your bumper sensors to prevent dirt buildup that could impair functionality.
- Recalibrate sensors periodically if instructed by your manufacturer especially after accidents or replacements.
- Schedule professional inspections during routine car servicing to identify potential issues early on.
Taking time to evaluate these factors thoroughly will help ensure that your choice between repair versus replacement aligns perfectly with your budgetary constraints and safety needs while maintaining reliable vehicle operation at all times.
Calibration and Testing After Sensor Replacement
Replacing a bumper sensor is only part of the process to ensure your vehicle’s safety systems function correctly. After installation, calibration and testing are critical steps to ensure the new sensor works seamlessly with other safety features like parking assist or collision warning systems. This stage requires attention to detail and specialized tools, often making it a task best suited for trained professionals.
Why Is Calibration Necessary?
- Missed detection:A poorly calibrated sensor might fail to detect objects in its range, compromising your safety.
- Malfunction of related systems:Parking assist, lane departure warnings, or automated braking could be impacted due to inaccurate readings from the sensor.
Calibration ensures that the new bumper sensor communicates accurately with your vehicle’s onboard systems while maintaining proper alignment with its surroundings.
Steps Involved in Calibration and Testing
- Preliminary System Check
Before calibration begins, technicians review the entire ADAS network to ensure all components are functioning correctly. This includes verifying power connections and checking for other potential issues unrelated to the replaced sensor. - Sensors need precise positioning to function correctly. Technicians often use specialized alignment tools or laser devices during this step.
- Improper alignment can alter how the system perceives distances or angles around the car.
- Reprogramming Using Diagnostic Tools
Once physical adjustments are made, diagnostic tools are connected to the vehicle’s control unit. - Updating software configurations for accurate sensor readings.
- Ensuring compatibility between newly installed sensors and existing ADAS systems.
- Testing Performance in Real Scenarios
After calibration is complete, technicians test the system under various conditions:- Simulated parking scenarios: To verify accurate detection of nearby objects.
- Obstacle detection trials: To confirm proper response times when detecting barriers.
- Functional checks on other safety features (if applicable), like adaptive cruise control or pedestrian detection.
DIY Calibration Should You Try It?
While some car enthusiasts prefer DIY solutions for minor repairs, calibrating a bumper sensor is not typically recommended as a do-it-yourself task due to its technical complexity:
- Specialized equipment may be required for precise adjustments.
- Incorrect calibration can lead to costly errors or unsafe driving conditions.
If you must attempt it yourself, refer closely to your vehicle manual and invest in professional-grade diagnostic tools specific to your car model.
| Calibration Method | Expert Assistance Needed? | Tools Required |
| Manual realignment | Yes | Laser alignment kits |
| Software reprogramming | Yes | Vehicle-specific diagnostic tool |
Final Safety Checks
Once calibration is finalized:
- Conduct regular inspections over time especially after minor collisions or routine maintenance to ensure sensors remain properly aligned post-repair.
- Monitor dashboard alerts; any persistent error warnings should prompt immediate professional assessment.
Calibrating and testing after replacing a bumper sensor not only restores performance but also ensures you’re fully leveraging your vehicle’s advanced safety technologies effectively keeping both you and others on the road safer from unforeseen obstacles ahead.
Calibration and Testing After Sensor Replacement
Once a bumper sensor has been replaced, the job isn’t complete until proper calibration and testing are carried out. Ensuring the new sensor functions correctly within this system is critical for both performance and safety.
Why Calibration Is Necessary
Replacing a bumper sensor disrupts its alignment with the car’s integrated systems. Without proper calibration, the sensor may not detect obstacles accurately or could trigger false alerts.
- Reduced functionality in parking assist or collision avoidance systems.
- Increased risk of accidents due to incorrect readings.
- Frustration caused by malfunctioning safety features.
Steps in Bumper Sensor Calibration
- The vehicle’s onboard computer (ECU) is reset to recognize the new sensor.
- Old error codes related to the damaged sensor are cleared.
- Technicians adjust the positioning of the new bumper sensor to ensure it aligns properly with other ADAS components.
- Specialized tools may be used for precise alignment.
- In some cases, software updates for the car’s ADAS system are required.
- Updates ensure compatibility between the newly installed sensor and existing systems.
- The vehicle is tested in controlled conditions using real-world scenarios (e. g. , reversing into tight spaces or approaching stationary obstacles).
- This ensures that all alerts and warnings function as they should.
Tools Used During Calibration
Calibration often requires specialized equipment, such as:
- Diagnostic scanners to interact with the ECU.
- Laser alignment tools for accurate positioning of sensors.
- Target boards or reflective surfaces used in some ADAS systems for recalibration testing.
| Equipment Type | Purpose |
| Diagnostic Scanner | Reset codes & verify system data |
| Laser Alignment Tools | Precise alignment of sensors |
| Reflective Targets | Test distance detection accuracy |
Importance of Testing After Replacement
Testing is an essential part of ensuring that your bumper sensor operates seamlessly with other vehicle functions.
- Obstacle Detection Tests:Verifies how well the system identifies objects at varying distances.
- False Positive Checks:Ensures no unnecessary alerts are triggered when there aren’t any obstacles present.
- System Integration:Confirms that other ADAS features reliant on bumper sensors (e. g. , adaptive cruise control) work correctly post-replacement.
DIY Calibration vs Professional Assistance
While some modern vehicles offer DIY calibration settings through their infotainment systems, it’s often best left to professionals due to:
- The complexity of ADAS technologies requires precision tools.
- Potential errors during calibration if performed improperly at home. Hiring a certified technician ensures long-term reliability and safety.
Proper calibration after replacing a bumper sensor isn’t just about restoring functionality it’s about maintaining your safety on every drive.