Inspecting the Area After Rust Removal
Steps for Inspection
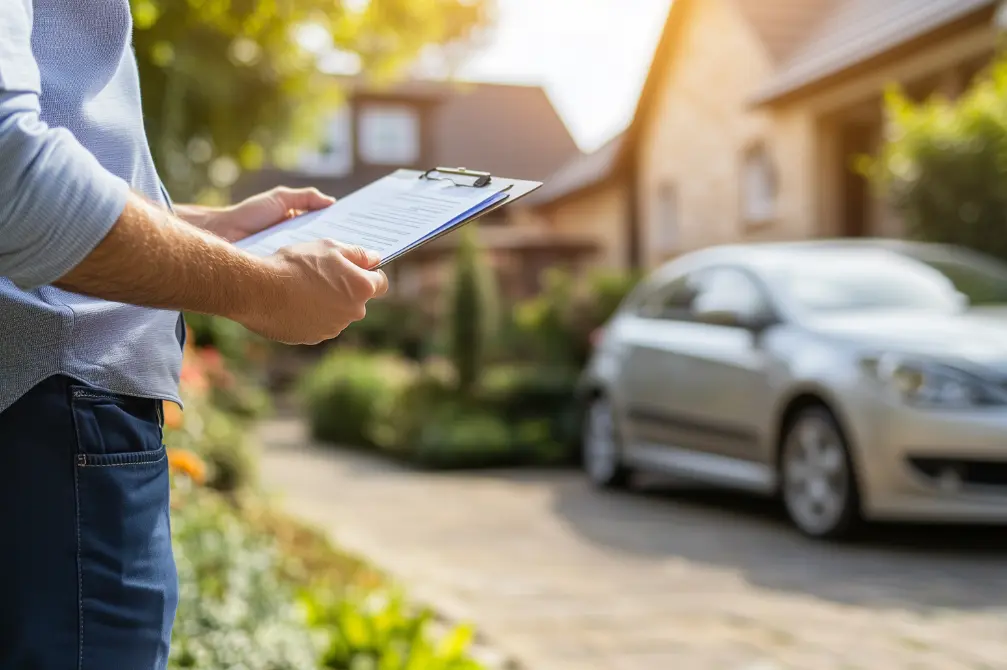
- After removing rust, carefully inspect the affected area under good lighting.
- Use tools like a magnifying glass or flashlight to spot tiny remnants of corrosion that might not be visible at first glance.
- Run your hand lightly over the surface to feel for rough patches or inconsistencies.
- Look for any signs of weakened metal caused by extensive rust damage.
- Tap gently on the surface using a small mallet or screwdriver; areas that produce a hollow sound may indicate thin or weak spots.
- Examine closely for any pits, holes, or divots left behind after rust removal. These imperfections will need proper filling to create a smooth painting surface later.
- Rust often spreads beyond where it’s immediately visible. Check surrounding panels and edges to ensure no hidden corrosion remains.
Tools You May Need
| Tool | Purpose |
| Flashlight | Spotting small patches of residual rust |
| Magnifying glass | Detailed inspection of hard-to-see areas |
| Mallet/screwdriver | Checking structural integrity |
Common Mistakes During Inspection
- Rushing through this step: Make sure to take your time and review every inch of the repaired area carefully.
- Skipping adjacent areas: Remember that rust can migrate, especially if moisture is involved.
- Ignoring tiny imperfections: Even minor flaws can affect paint adhesion and durability.
Why Thorough Inspection Matters
Ensuring all traces of rust are removed is essential not just for aesthetic reasons but also for structural integrity and preventing further damage down the road. A clean, smooth surface will also make subsequent steps such as priming and painting more effective by providing better adhesion and uniformity in appearance.
By taking these measures during inspection, you set the foundation for a high-quality repaint job that will last years without recurring issues like flaking paint or new rust spots forming in hidden crevices.
Preparing the Metal Surface for Paint
After removing rust from your vehicle, preparing the metal surface properly is critical to ensure a smooth and durable finish when repainting. Skipping or rushing this step can result in poor adhesion of paint, uneven surfaces, or recurring rust issues. Below is a detailed guide on how to prepare the metal surface for painting effectively.
Cleaning the Surface
- Remove Residues: Begin by thoroughly cleaning the treated area to remove any grease, oil, dirt, or chemical residues left behind after rust removal. Use an automotive degreaser or a wax and grease remover specifically designed for car surfaces.
- Sand Any Oxidation: Even if rust has been removed, microscopic traces can remain. Use fine-grit sandpaper (e.g., 320-600 grit) to lightly sand and smooth out the area while ensuring no rust particles linger.
Smoothing Out Irregularities
- Check for Pitting or Dents: Examine whether the rust removal process left behind pitting (small holes) in the metal or other imperfections.
- Apply Filler if Needed: For minor pitting or dents in the metal surface, consider using a high-quality automotive body filler. Spread it evenly across the damaged areas with a putty knife and allow it to cure as per manufacturer instructions.
- Sand Smoothly: Once cured, sand down the filler using progressively finer grits of sandpaper until it blends seamlessly with surrounding metal.
Removing Old Paint Edges
If you’re repainting over existing paint around the repaired area:
- Use a dual-action (DA) sander with medium-grit sandpaper (e.g., 240 grit) to feather-edge old paint around the repaired zone. This prevents visible ridges where new paint meets old layers.
- Avoid harsh transitions between bare metal and painted surfaces by working gradually outward from the repair.
| Tool/Material Needed | Purpose | Recommended Options |
| Fine-Grit Sandpaper | Smoothing small irregularities | 320–600 grit |
| Automotive Body Filler | Filling in minor pitting/dents | Polyester-based fillers |
| Dual-Action Sander | Blending edges of old paint | Electric/pneumatic DA sander |
| Wax & Grease Remover | Cleaning before primer application | Solvent-based automotive cleaner |
Dealing With Bare Metal Exposures
When preparing areas where rust removal exposed bare metal:
- Deoxidize Metal Surfaces: Apply a metal conditioner or phosphoric acid-based prep solution to neutralize any remaining oxidation on exposed steel.
- Scuff Lightly Before Priming: Scuff up bare metal areas using a red scuff pad or fine steel wool to promote better primer adhesion.
Masking Adjacent Areas
Before proceeding with primer application:
- Protect nearby sections of your car from overspray by masking them off with painter’s tape and automotive masking paper.
- Pay special attention to edges, trim pieces, windows, and tires.
Quality preparation is essential for achieving professional-level results when repainting your car after rust removal. By paying attention to every detail during this stage cleaning thoroughly, smoothing imperfections, feathering old paint edges you lay a strong foundation for applying primer and topcoats effectively while ensuring long-lasting protection against future corrosion.
Repairing and Priming the Affected Area
Assessing the Damage
Before applying any primer or filler, take a closer look at the extent of the damage:
- Check for Pitting or Holes: Deep pitting or perforations in the metal may require additional repairs, such as welding or using fiberglass patches.
- Evaluate Structural Integrity: If rust has compromised the strength of any panel or component, replacement might be necessary instead of repair.
Filling Imperfections
If minor imperfections remain after rust removal, use an appropriate body filler to restore a smooth surface:
Choose the Right Filler: Opt for automotive-grade fillers like Bondo or polyester-based putty designed for repairing sheet metal.
- Mix Thoroughly: Follow manufacturer instructions to mix filler with its hardener.
- Apply in Thin Layers: Use a plastic spreader to apply thin coats over dents, scratches, or uneven areas.
- Sand After Curing: Once cured (typically 20–30 minutes), sand down with progressively finer grits (e.g., 80-grit followed by 180-grit) until smooth.
Cleaning Before Priming
Proper cleaning is essential before applying primer to ensure adhesion and prevent contamination:
- Use wax and grease removers to eliminate oils left from handling.
- Remove dust from sanding with compressed air or tack cloths.
- Avoid touching cleaned surfaces directly with bare hands.
Applying the Primer
When you’re ready to prime, follow these steps:
- Mask off surrounding areas using painter’s tape and plastic sheeting to avoid overspray.
- Use an HVLP spray gun for even application (or aerosol cans for smaller jobs).
- Apply light coats in steady passes: – Typically 2–3 coats are recommended for optimal coverage. – Allow proper drying times between layers per product instructions (usually 10–15 minutes).
- Sand lightly after curing with fine-grit sandpaper (320–400 grit) if you notice minor surface inconsistencies.
Tips for Long-Term Protection
Taking extra steps during this stage can enhance durability:
- Seal edges where panels meet using seam sealer to keep moisture out.
- Consider adding a rust-inhibiting primer layer before paint if your vehicle experiences harsh weather conditions regularly.
By carefully repairing imperfections and selecting high-quality primers suited for your project, you’ll create a solid foundation that ensures your paint job looks professional and lasts longer without peeling or bubbling issues later on.
Repairing and Priming the Affected Area
Once rust has been removed from your vehicle, the next critical step is repairing and priming the affected area. This process ensures that the surface is smooth, properly sealed, and ready to accept paint. Skipping or rushing this step can lead to uneven finishes or paint that doesn’t adhere well.
Assessing Damage After Rust Removal
Before repairs begin, carefully examine the area where rust was removed. Look for:
- Thin or weakened metal: Rust often eats away at the surface, leaving it thinner than surrounding areas.
- Holes or pits: Severe rust can leave perforations in the metal.
- Warped surfaces: Aggressive rust removal methods (like grinding) can sometimes warp panels if not done carefully.
For minor imperfections like surface pitting, filler may be sufficient. For more extensive damage such as large holes or weakened panels, metal patching or replacement may be necessary.
Preparing for Repairs
To ensure durable results, follow these steps before applying filler or primer:
- Clean thoroughly: Use a wax and grease remover to eliminate any contaminants like oil or residue from sanding.
- Sand further if needed: Ensure the surface is smooth with no sharp edges where rust was removed.
- Mask off surrounding areas: Protect adjacent panels to keep repair materials confined to the damaged area.
Applying Body Filler
Body filler is commonly used to restore a smooth surface over minor imperfections caused by rust removal:
- Mix an appropriate amount of body filler with hardener according to product instructions.
- Spread the mixture evenly over pits or scratches using a plastic applicator.
- Allow it to cure fully before sanding it down with progressively finer grit sandpaper (e.g., start with 80-grit and finish with 220-grit).
- Repeat as needed until a perfectly smooth finish is achieved.
Priming the Surface
Priming creates a barrier between bare metal and environmental elements while providing an ideal base for paint adhesion:
- Choose a high-quality automotive primer suited for your car’s body type (e.g., self-etching primer for bare metal or epoxy primer for better corrosion resistance).
- Apply several light coats rather than one heavy coat for even coverage without drips.
- Allow adequate drying time between coats as specified by the product’s instructions.
| Primer Type | Best For | Pros |
| Self-Etching Primer | Bare metal | Excellent adhesion; prevents rust |
| Epoxy Primer | Corrosion resistance | Strong seal; durable undercoat |
| Urethane Primer | Prepped surfaces ready for painting | Easy sanding; good overall coverage |
After priming, inspect your work closely for flaws such as bubbles, uneven texture, or missed spots. Re-sand any problematic areas lightly before moving forward.
By meticulously repairing and priming after rust removal, you lay a strong foundation for professional-looking results when it comes time to repaint your vehicle’s surface.
Blending the New Paint With Existing Panels
Blending new paint with the existing panels of your vehicle is a critical step in ensuring a seamless finish after rust removal and repainting. When done properly, this process makes it nearly impossible to distinguish between the newly painted areas and the original paintwork. This section outlines key techniques, tools, and considerations for achieving professional-grade results when blending paint.
Why Blending Is Important
- Aesthetic Consistency: Without proper blending, newly painted sections might stand out, creating a patchy or uneven appearance.
- Color Matching Challenges: Even if the paint color is matched perfectly to your vehicle’s original factory shade, external factors like sun exposure and aging can alter the surrounding panel’s color. Blending helps account for these nuances.
- Professional Finish: Proper blending enhances the overall look of your car, giving it a flawless and uniform finish.
Tools and Materials Needed
To blend new paint with older panels effectively, you will need:
- Automotive spray gun or aerosol spray cans (depending on scale)
- Masking tape and plastic sheeting
- Sandpaper (grit ranging from 600 to 2000) – Blending solvent or reducer
- Clean microfiber cloths – Polishing compounds and buffing tools
Step-by-Step Process for Blending Paint
- Use masking tape and plastic sheeting to protect parts of the car that you don’t want to be affected by overspray.
- Ensure clear boundaries to prevent accidental spraying on adjacent panels.
- Lightly sand around the edges of the repaired area using 600-grit sandpaper.
- Focus on feathering out any harsh lines where old paint meets new primer or basecoat. This creates a gradual transition zone.
- Spray thin layers of basecoat over the repaired area while overlapping slightly onto adjacent panels.
- Avoid fully saturating nearby areas; instead, gently taper off coverage as you move outward from the repair site.
- Apply blending solvent over the transitional areas where new basecoat overlaps with old paint.
- The solvent softens both paints slightly, allowing them to merge seamlessly without visible lines.
- Cover both newly painted sections and partially overlap onto existing panels with clearcoat.
- Ensure even application to create a smooth surface that protects both old and new paint layers.
- After allowing sufficient drying time (as per manufacturer instructions), wet-sand using high-grit sandpaper such as 1500–2000 grit.
- Buff out any imperfections with polishing compounds for a glossy finish that matches surrounding panels.
Common Challenges in Paint Blending
| Challenge | Solution |
| Visible demarcation lines | Use additional blending solvent or refine feathered edges during sanding |
| Mismatched gloss levels | Apply consistent clearcoat across blended areas |
| Overspray on unwanted areas | Carefully mask non-repair surfaces |
Practical Tips for Successful Results
- Work in an environment free from dust and debris to prevent imperfections in freshly applied paint.
- Practice spraying technique beforehand if using automotive spray guns or aerosol cans for the first time.
- Start with light coats rather than heavy applications; multiple thin layers yield smoother transitions than one thick coating.
Proper technique when blending ensures not only aesthetic appeal but also enhanced durability of your repair work contributing to an overall improved appearance of your vehicle while maintaining its resale value.
Blending the New Paint With Existing Panels
Blending new paint with the existing panels of a car is one of the most critical steps in achieving a seamless and professional-looking finish. Proper blending ensures that the repaired area transitions smoothly into the rest of the vehicle, maintaining a uniform appearance. This process involves precision, attention to detail, and proper technique to avoid noticeable lines or mismatched colors.
Why Is Blending Important?
- Avoiding Visible Repairs: Without proper blending, new paint can stick out and make repairs obvious.
- Maintaining Aesthetic Value: Seamless blending preserves your car’s original look and enhances its resale value.
- Color Matching Challenges: Even if you use factory-matched paint codes, differences in fading due to sun exposure or wear can make color matching imperfect. Blending compensates for such variations.
Tools and Materials Required
To blend new paint effectively into existing panels, gather the following items:
- Automotive-grade masking tape.
- Sandpaper (variety of grits, e.g., 600-grit for sanding edges).
- Spray gun or aerosol cans for basecoat and clearcoat application.
- Polishing compound or rubbing compound.
- A microfiber cloth for buffing.
Steps to Blend Paint Successfully
- Use automotive masking tape and paper to cover areas that should not be painted. This prevents overspray while focusing on the repair zone.
- Lightly sand around the repaired area with 600-grit sandpaper to create a smooth transition between old and new paint. Feather-sanding ensures that there are no abrupt edges where layers meet.
- Begin spraying thin layers of basecoat over the repaired area using light strokes. Extend each coat slightly beyond the previous one to fade it into the surrounding panel.
- Allow each layer to dry completely before applying the next coat.
- While applying each layer of basecoat, reduce spray pressure near the edges where it meets existing paint to achieve an invisible transition. Overlap lightly into adjacent areas.
- Once satisfied with blending, cover both the repaired section and adjacent areas with clearcoat for a uniform gloss finish.
- Use even strokes while spraying clearcoat, ensuring consistency across panels.
- After allowing sufficient drying time for all layers (typically 24–48 hours), polish with a rubbing compound to remove minor imperfections in texture or sheen.
- Buff using a microfiber cloth until smooth and shiny.
Common Mistakes in Blending
To avoid issues during blending:
- Don’t rush drying times between coats; this can result in uneven application or runs in your paint.
- Avoid harsh transitions by feather-sanding properly before painting begins.
- Ensure your spray gun settings are optimized for an even flow during application.
Table: Quick Overview of Key Steps
| Step | Action | Purpose |
| Mask Adjacent Areas | Use masking tape & paper | Protect from overspray |
| Feather Sand Edges | Sand edges around repair | Create smooth transitions |
| Apply Basecoat | Spray thin overlapping coats | Achieve even color coverage |
| Blend Paint | Fade into existing paint | Ensure seamless transitions |
| Apply Clearcoat | Cover entire panel | Provide consistent gloss |
| Buff & Polish | Remove imperfections after drying | Improve finish quality |
Blending requires patience and practice but is essential for professional-quality results when repainting over rust removal repairs. Following these guidelines will help you achieve a flawless finish that matches your vehicle’s original aesthetics seamlessly without any evidence of prior damage.
Blending the New Paint With Existing Panels
When repainting a car after rust removal, blending the new paint with the existing panels is a critical step to ensure a seamless appearance. This process not only enhances the aesthetics of your vehicle but also increases its resale value by making repairs virtually undetectable. Proper blending involves careful preparation, skill, and attention to detail.
Why is Blending Important?
Blending ensures that the newly painted section matches the surrounding areas of the vehicle. Even if you have a perfect color match for your car’s paint, slight variations can occur due to:
- Sun exposure or fading: Over time, existing paint may fade due to UV exposure.
- Paint layers: The thickness of paint layers can affect how light reflects off the surface.
- Application technique: The way paint is sprayed can alter its final appearance.
Without proper blending, repairs may appear patchy or noticeable under certain lighting conditions.
Step-by-Step Guide to Blending Paint
- After priming and sanding the affected area, gradually feather-edge (smooth out) the surrounding paint using fine-grit sandpaper (e.g., 800-1200 grit). This creates a seamless transition zone between old and new paint.
- Mix your basecoat thoroughly and test it on a piece of scrap metal or cardboard before application. Compare it under natural light against your vehicle to ensure an accurate match.
- Begin spraying from the repair area outward in light passes.
- Decrease pressure or widen your spray pattern as you reach surrounding panels to create a soft transition.
- Allow each coat to flash dry before applying another (usually 10-15 minutes).
- Using Blending Agents (optional)
- Some professionals use blending reducers or specialized agents that help dissolve edges of fresh paint into existing clearcoat for smoother results.
- Once satisfied with color blending, add layers of clearcoat over both the repair area and surrounding panels.
- Overlap each layer slightly beyond where you applied basecoat to further unify old and new sections.
- After curing (typically 24-48 hours), wet sand using ultra-fine sandpaper (1500-2000 grit) if necessary.
- Polish using rubbing compound followed by fine polishing paste for an even shine across all panels.
Common Mistakes During Blending
Avoid these pitfalls when attempting to blend new paint with older panels:
- Skipping proper sanding or feather-edging steps leads to visible lines between old and new paint layers.
- Applying too much or too little basecoat causes uneven transitions.
- Not accounting for environmental factors like temperature or humidity during painting can impact drying times and finish quality.
Tools You’ll Need
| Tool/Material | Purpose | Examples |
| Automotive Spray Gun | Even application of base & clearcoat | HVLP spray gun |
| Sandpaper | Smoothing surface & feather-edging | 800–2000 grit |
| Polishing Compound | Restoring shine post-painting | Cutting compound & polish |
| Color Matching System | Ensures precise color match | Spectrophotometer tools |
By following these steps with precision, you can achieve professional-grade results while maintaining a seamless finish on your vehicle’s exterior repairs.