Final Inspection of the Completed Repairs
Before your car is returned to you, one of the most important steps is the final inspection of the completed repairs. This process ensures that all work performed meets both industry standards and your expectations. A thorough inspection guarantees that your vehicle is safe, functional, and aesthetically restored.
Why Final Inspections Are Crucial
- Safety Assurance: Verifies that any safety-related repairs were completed correctly to ensure roadworthiness.
- Quality Control: Confirms the quality of work done matches professional standards and eliminates any errors or oversights.
- Customer Satisfaction: Ensures every aspect of the repair has been addressed so there are no surprises upon delivery.
Key Areas Inspected During Final Checks
- Inspect for scratches, dents, or chips not addressed in the repair process.
- Verify panel alignment and paint color consistency (to be covered in detail under another header).
- Ensure that any interior elements disturbed during repairs (e.g., dashboard panels or upholstery) have been restored properly.
- Check for cleanliness inside the vehicle.
- Confirm that all mechanical systems repaired—such as brakes, suspension, engine components—are fully operational.
- Test essential features like heating, air conditioning, lights, wipers, etc.
- Cross-check original repair instructions with what was completed to confirm all requested work was carried out.
- Look for grease marks or smudges left on surfaces after repair.
- Check for proper cleaning and detailing as part of final presentation (further explained under a separate section).
Professional Standards in Final Inspection
| Checklist Component | Verified During Inspection? |
| Paintwork quality | Yes |
| Alignment of repaired parts | Yes |
| Wiring/harness connections | Yes |
| Safety system functionality | Yes |
This systematic approach helps technicians ensure zero compromises on safety or quality before handing back your vehicle.
Notes on Communication with Customers
After completing a final inspection, many shops will walk customers through their findings before delivering their car. This conversation may include:
- Explaining what repairs were done and why certain techniques were used.
- Highlighting areas where significant improvement was made (e.g., completely removing dents or restoring paintwork)
- Confirming satisfaction by answering any questions customers might have about their car’s performance or appearance.
By conducting meticulous inspections prior to handing over your car, repair professionals aim to provide peace of mind while maintaining trust in their services.
Checking Panel Alignment, Paint, and Bodywork
Panel Alignment
- Visual Inspection: Technicians carefully examine whether all panels are properly aligned. Misaligned panels can be an indicator of improper installation or underlying damage.
- Gap Consistency: The spaces between doors, hoods, trunks, and other adjacent panels are measured to ensure uniformity. Uneven gaps can affect the overall aesthetic and even aerodynamics.
- Door and Trunk Closure: The alignment test also includes checking how smoothly doors, trunk lids, and the hood open and close. Resistance or improper closing indicates further adjustments may be needed.
Paint Quality
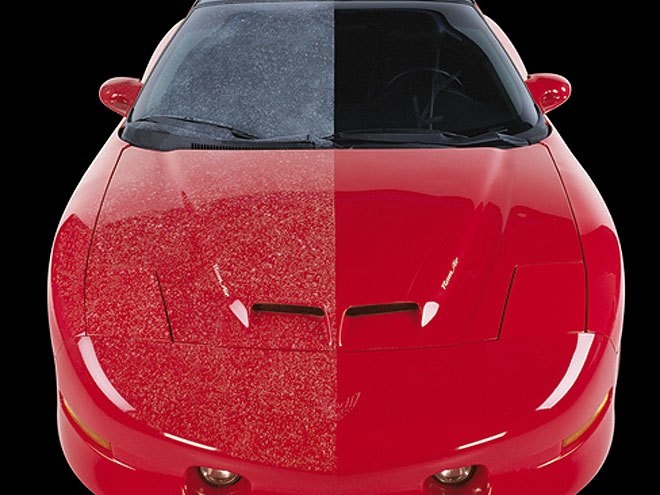
- Color Matching: Repair shops use advanced color-matching technology to ensure that any freshly painted sections blend seamlessly with the rest of the car’s paintwork.
- Texture Consistency: The surface texture (e.g., glossiness or matte finish) is compared against the existing paint to ensure there’s no visual discrepancy.
- Scratch or Imperfection Check: Technicians inspect for small imperfections like dust particles trapped in fresh paint or minor scratches that may have occurred during repairs.
Bodywork
Restoring damaged body panels isn’t just about aesthetics; it also involves structural integrity:
- Smooth Surfaces: Repaired areas are checked for smoothness by both touch and sight. Any dents or uneven surfaces need to be addressed before final delivery.
- Structural Soundness: For areas where collision damage was extensive, professionals confirm that welds, reinforcements, or replaced sections meet safety standards.
Tools Used in Assessment
| Task | Tool/Technique |
| Measuring panel gaps | Precision gap gauges |
| Surface smoothness | Visual inspection & hand assessment |
| Paint color matching | Digital spectrophotometer |
This detailed inspection process ensures that your repaired vehicle doesn’t just work well but also maintains its original look and feel as though it had never been damaged.
Checking Panel Alignment, Paint, and Bodywork
When a car undergoes repairs, especially after an accident or significant damage, ensuring the exterior looks as good as new is a critical step before returning it to the owner. This involves a meticulous inspection process to confirm that the vehicle’s visual and structural integrity meets professional standards.
Panel Alignment: Restoring Precision
Proper panel alignment ensures that all body panels fit seamlessly together. Technicians inspect:
- Panel Gaps: Measuring gaps between panels (e.g., doors, hood, trunk) to ensure uniformity on all sides. Uneven gaps can indicate improper repairs or misaligned components.
- Flush Surfaces: Checking that adjacent panels sit at the same height to avoid uneven surfaces. Misalignment can affect aesthetics and aerodynamics.
Using specialized tools like alignment gauges or laser measuring systems ensures accuracy during this process.
Paint Matching and Quality Control
After bodywork repairs, color matching is a significant step in restoring the car’s appearance:
- Paint Matching: Repair shops use advanced spectrophotometers to match the original factory color precisely. This avoids any noticeable discrepancies between repaired areas and the rest of the car.
- Paint Application: The paint must be applied evenly with no visible streaks or blemishes. Layers of clear coat are also inspected for smoothness and consistency.
Technicians perform checks under natural light conditions and in well-lit environments to identify any flaws like overspray, orange peel texture, or uneven shading.
Bodywork Inspection Checklist
The bodywork inspection focuses on ensuring both aesthetics and safety:
- Repair welds are inspected for strength and neatness.
- Dents are absent from repaired areas without residual impressions.
- Surface texture matches factory standards—smooth with no ripples or imperfections caused during repair processes.
Technicians also evaluate whether protective coatings (like anti-corrosion paint) have been reapplied where necessary to safeguard against rust in repaired areas.
The Importance of This Process
Accurate panel alignment, flawless paint matching, and professional-grade bodywork restoration don’t just enhance aesthetics—they also maintain your vehicle’s resale value and structural integrity post-repair. If these elements are overlooked or rushed, it could lead to dissatisfaction for vehicle owners or even create potential safety concerns down the line.
By paying attention to fine details during this stage of inspection, repair teams ensure that your car looks pristine while aligning with manufacturer specifications—restoring your confidence as you take it back onto the road.
Scanning and Calibrating Safety and Driver-Assist Systems
What Is Scanning and Why Is It Important?
Vehicle scanning refers to a diagnostic process performed using specialized tools to check for any error codes or system malfunctions. Post-repair scanning ensures that all onboard systems are communicating correctly with each other and that no faults are present.
- Initial Scan: Conducted prior to repairs to identify existing issues.
- Post-Repair Scan: Performed after work is completed to confirm all issues have been resolved.
The Role of Calibration in Safety Features
Calibration fine-tunes the accuracy of safety-critical systems that rely on sensors, cameras, or radar technology. Without proper calibration, these features may not operate as intended, potentially compromising safety.
Key scenarios where calibration is necessary:
- Windshield Replacement: When a windshield-mounted camera for lane assist or adaptive cruise control is removed or replaced.
- Collision Repairs: Adjustments may be needed if sensors were impacted during an accident.
- Suspension Work: Changes in ride height can disrupt sensor alignment.
Examples of calibration tasks:
- Adjusting radar aiming for adaptive cruise control functionality.
- Recalibrating cameras used for parking assist or lane centering.
Steps in Scanning and Calibration
- System Diagnostic Check: Specialized scanners analyze all electronic modules for fault codes.
- Sensor Inspection: Technicians verify that physical components like cameras and radars align properly with manufacturer specifications.
- Calibration Setup: Depending on the system being calibrated, technicians might use targets, specialized equipment, or test drives at specific speeds.
- Validation Testing: After adjustments are made, the car undergoes another round of testing to confirm all features function correctly.
Benefits of Proper Scanning and Calibration
Ensuring these advanced systems work flawlessly benefits drivers by:
- Enhancing vehicle safety through precise functioning of collision avoidance technologies.
- Avoiding unnecessary warnings or deactivations while driving
- Maintaining compliance with manufacturer standards.
By carefully scanning and calibrating safety-related components before returning your car, repair professionals provide peace of mind that your vehicle can deliver both performance and protection on the road.
Road Testing the Vehicle When Required
Purpose of Road Testing
A road test serves multiple functions:
- Verify Mechanical Repairs: Mechanics assess whether repaired or replaced parts, such as brakes, suspension systems, or engines, are functioning optimally.
- Test Electrical Components: Features like lights, wipers, power windows, and infotainment systems are inspected to ensure they work seamlessly.
- Evaluate Safety Systems: Critical safety systems like airbags and anti-lock braking systems (ABS) may be activated during the drive to confirm proper functionality.
- Ensure Comfort and Handling: Any noise concerns (e.g., rattles or squeaks), strange vibrations, or misalignments are carefully noted and addressed if needed.
What Happens During the Road Test?
- Check for warning lights on the dashboard.
- Assess smoothness of engine ignition and idle behavior.
- Inspect how the car performs under low-speed conditions (e.g., residential streets).
- Evaluate steering precision and braking responsiveness.
- Test acceleration capability on highways or open roads where possible.
- Analyze stability at higher speeds.
- Take tight turns to evaluate suspension performance.
- Test handling around curves or roundabouts for balance issues.
- If weather permits (rainy/snowy conditions), confirm traction control engagement.
- Address drivetrain performance on uneven terrain if relevant to repairs.
Common Issues Identified During Road Tests
A detailed road test often uncovers subtle issues that may go unnoticed in a static inspection environment:
- Unusual noises from repaired mechanical systems (e.g., grinding sounds from brakes).
- Inaccurate alignment of steering or suspension components.
- Delays in throttle response post-engine tuning or repair.
How Technicians Ensure Precision
To avoid missing any detail during the road test phase:
- Technicians may use diagnostic tools before and after driving to monitor system performance in real time.
- A checklist tailored to your vehicle’s repair needs ensures nothing is overlooked.
- Feedback is documented immediately after completion so any irregularities can be corrected prior to delivery.
The goal of this process is not just functional restoration but also ensuring drivers feel confident about their car’s reliability upon return. This thorough testing acts as a safeguard against incomplete repairs while prioritizing your safety on the road moving forward.
Cleaning, Detailing, and Preparing the Car for Handover
Once your car has undergone all necessary repairs and inspections, the final step before it is returned involves cleaning, detailing, and preparing it for handover. This process is essential to ensure not only that the vehicle is mechanically sound but also that it meets high standards of presentation. A clean and polished vehicle adds to a positive customer experience and highlights the quality of work performed.
Exterior Cleaning
- Thorough Wash: The vehicle is washed to remove any dust, dirt, or residue from repair processes like sanding or painting.
- Paint Finish Check: As part of the wash process, technicians also check for any imperfections in paint application or finish consistency.
- Waxing (if applicable): A waxing layer may be applied to protect the paintwork and enhance its shine.
- Wheel Cleaning: Tires and rims are scrubbed to remove dirt or brake dust buildup for a polished appearance.
Interior Detailing
- Vacuuming: The carpets, seats, floor mats, and trunk area are vacuumed thoroughly.
- Surface Wipe-downs: All surfaces—dashboard, console areas, door panels—are cleaned with appropriate solutions to remove fingerprints or smudges.
- Window Polishing: Both interior and exterior glass surfaces are cleaned for a streak-free finish.
- Odor Elimination (if needed): If any odors remain from repair work or general use of the car, deodorizing products may be used.
Addressing Post-repair Residues
Repairs often leave behind small traces of materials such as:
- Dust from sanding bodywork components
- Chemical residues from adhesives or sealants The detailing team ensures that every trace is eliminated before returning your car.
Checking Operational Functions During Preparation
Before handing back the keys, operational elements related to cleanliness are reviewed:
- Wipers & Washer Fluid Levels: Ensuring visibility functionality aligns with safety standards.
- HVAC System Vents: Cleared air ducts prevent dust release while driving post-detail.
| Task | Purpose |
| Washing & Waxing | Enhances appearance; protects paint |
| Vacuuming & Surface Wiping | Removes dust particles inside |
Reviewing the Repair, Paperwork, and Final Delivery Details
Once all repairs have been completed to your vehicle, an essential final step before handing it back to you is a thorough review of both the repairs and accompanying paperwork. This ensures everything is in order, providing transparency and building trust between the repair facility and the customer. Below is an overview of how this process typically unfolds.
Double-Checking Repair Accuracy
- Visual Inspection: Technicians or team leads perform a final walkthrough of all areas that underwent repair. They ensure no details have been overlooked. For example:
- Confirming there are no visible defects in paint or bodywork.
- Ensuring replacement parts are correctly installed.
- Functionality Checks: All systems affected by the repair are tested for proper performance, such as brakes, suspension, or electrical components.
Paperwork Review
The documentation serves as an official record of what has been done to your vehicle during its time at the facility.
- Job Order Verification: The service team ensures that all tasks outlined in the initial job order have been addressed.
- A complete itemized list of parts used during repairs.
- Detailed labor breakdown indicating how time was allocated during each phase of work.
- Warranty Information: If any parts or services include warranties, these details are confirmed for accuracy before they’re provided to you.
- Additional Notes for Future Maintenance (if applicable): Sometimes technicians may discover non-urgent maintenance needs while working on your car—these will be documented for future reference.
Final Quality Assurance Checklist
Repair facilities often use a standardized checklist to confirm that every aspect of the repair process meets quality standards before releasing the vehicle to its owner. This checklist may include items like:
- Panel alignment consistency.
- Even paint finishes with no mismatched colors or overspray.
- Proper operation of mechanical systems (e.g., windows, locks).
- Interior cleanliness after repairs (especially if interior components were accessed).
Preparing for Handover
Before returning your vehicle, staff members ensure that everything is ready for a smooth delivery experience:
- The car undergoes cleaning and detailing so it’s returned in excellent condition.
- All personal belongings removed during repairs are returned (e.g., floor mats or dashboard accessories).
Additionally, any calibration data from advanced driver-assist systems (ADAS) or new software updates applied during service will be reviewed with you if necessary.
Customer Communication During Delivery
When you arrive to pick up your car:
- A staff member will walk you through the completed work step by step.
- They’ll address any concerns or questions about what was repaired and why specific parts were replaced.
- You’ll receive recommendations on best practices for maintaining new components (if relevant).
By carefully reviewing both the technical aspects of your car’s repair and ensuring transparency in communication through clear paperwork, this final stage allows customers to feel confident that their vehicle has been restored properly and thoroughly cared for throughout every phase of service delivery.