What Causes Clear Coat to Peel and Flake?
Clear coat peeling, also known as delamination, is a common yet frustrating issue for car owners. The clear coat serves as a protective layer over your car’s paint, shielding it from UV rays, scratches, and environmental contaminants. However, when this layer fails, it can lead to visible peeling or flaking. Understanding the causes behind clear coat damage can help you take steps to minimize the risk.
Key Causes of Clear Coat Peeling
- Prolonged exposure to sunlight is one of the primary reasons clear coats begin to degrade.
- UV rays break down the chemical bonds in the clear coat over time, making it brittle and prone to cracking.
- This is especially common in cars parked outdoors without any form of shade or protection.
- When the base coat or primer underneath isn’t properly prepared during a paint job, adhesion issues can occur.
- Applying too thin or too thick a layer of clear coat can also lead to premature peeling.
- Acid rain, bird droppings, tree sap, and road salt are all enemies of your car’s clear coat.
- These contaminants can break down and eat away at the surface if allowed to linger.
- Scratches or chips from debris on roads or minor accidents can compromise the integrity of the protective layer.
- Once damaged, water and other contaminants can seep under the clear coat and accelerate peeling.
- Over time, even high-quality paint jobs naturally degrade due to exposure to environmental elements.
- Older cars without regular maintenance are particularly susceptible to failing clear coats.
Comparison Table: Common Causes vs. Preventability
Cause | Preventable with Proper Care? |
UV Damage | Yes |
Improper Paint Application | Not by owner (requires professional work) |
Environmental Factors | Yes |
Physical Damage | Partially |
Aging/Wear | No (can only slow down) |
Lesser-Known Contributing Factors
- Harsh Cleaning Products
Using abrasive cleaning tools or harsh chemicals during washes can strip away layers of protection on your vehicle’s exterior. - Neglecting Regular Waxing
Wax acts as an additional barrier between your car’s paint and damaging elements like sun exposure or contaminants. Skipping this step increases vulnerability over time.
Understanding why clear coats peel allows you to take proactive steps in caring for your vehicle’s finish. With proper maintenance—like frequent washing, waxing, and parking in shaded areas—you can extend your car’s lifespan while keeping it looking its best for years ahead.
What Causes Clear Coat to Peel and Flake?
Clear coat peeling, also known as clear coat failure, is a common problem that affects the appearance and longevity of a car’s paint. Understanding the root causes behind this issue can help car owners take preventive action and maintain their vehicle’s finish for years to come.
Common Causes of Clear Coat Peeling
- UV Damage
Prolonged exposure to direct sunlight is one of the leading causes of clear coat damage. UV rays gradually break down the chemical bonds in the clear coat, causing it to weaken and eventually peel away from the base layer. - If a vehicle’s clear coat was applied too thinly during manufacturing or repair, it may not offer adequate protection.
- Failing to properly prep a surface before applying clear coat can also lead to adhesion issues.
- Environmental Factors
Exposure to harsh weather conditions, such as extreme heat, cold, or humidity, can accelerate degradation. Acid rain and salt from roads are also culprits that contribute to peeling over time. - Chemical Damage
Certain chemicals—such as harsh cleaners, degreasers, or bird droppings—can erode the clear coat if left untreated. These substances often compromise its protective layer. - Frequent use of abrasive cleaning tools like stiff brushes or dirty sponges can cause micro-scratches in the clear coat.
- Chips caused by rocks or debris on highways create vulnerable spots where peeling can begin.
- Neglecting Regular Maintenance
Without routine washing and waxing, dirt buildup can erode the bond between layers over time. A lack of maintenance leaves your car’s exterior exposed to harmful elements.
How Clear Coat Protects Your Car
The primary purpose of a clear coat is to act as a shield between your vehicle’s base paint and environmental stresses such as UV rays, water damage, and minor abrasions. It enhances gloss while preserving color vibrancy—but when compromised, these benefits disappear quickly.
Cause | Impact on Clear Coat | Preventive Measures |
UV Rays | Weakens bonds in coating | Park in shade/use UV-resistant wax |
Poor Application | Causes early peeling | Ensure professional application |
Harsh Chemicals | Eats away at surface | Rinse off contaminants immediately |
Abrasive Tools | Creates scratches that lead to failure | Use microfiber materials |
Understanding these causes empowers car owners not only to repair existing damage but also prevent future issues through better care practices. By addressing these factors proactively—such as parking in shaded areas and using appropriate cleaning products—you can extend the life of your car’s exterior finish significantly without resorting immediately to costly repairs or refinishing jobs at a body shop.
Can Peeling Clear Coat Be Repaired?
Peeling clear coat can often be repaired, but the level of repair depends on the extent of the damage, the condition of the underlying paint, and your budget. Below is an overview of common solutions to address peeling clear coat, their effectiveness, and when they might be appropriate.
Assessing the Damage
Before attempting to repair a peeling clear coat, it’s essential to evaluate how extensive the issue is: – Small affected areas: If only a small section of clear coat has started to peel, such as on a corner or edge, repairs can typically be done without addressing an entire panel.
– Widespread peeling: Large-scale damage across multiple sections or severe degradation may require sanding and refinishing.
– Exposed paint layers: If patches of bare paint are visible under peeling clear coat, repairs need to happen quickly before oxidation or rust occurs.
Repair Options for Peeling Clear Coat
- Sand down just the peeling area using fine-grit sandpaper (e.g., 1500-2000 grit) to create a smooth surface.
- Blend edges into intact areas of the original clear coat.
- Clean thoroughly before applying touch-up spray or brush-on clear coat.
- Buff and polish after curing for a seamless finish.
Pros: Cost-effective for small areas; minimal tools required.
Cons: May not blend perfectly with surrounding surfaces. - Sand off all remaining layers of damaged clear coat from the affected panel.
- Reapply primer (if needed), basecoat (matching paint color), and new clear coat in layers.
- Allow adequate drying time between coats and buff/polish afterward.
Pros: Creates a flawless look; addresses larger areas uniformly.
Cons: Requires advanced skills or professional help; more time-intensive and costly. - Use automotive wax or polish to temporarily mask minor imperfections in peeling areas.
- Apply a protective sealant over exposed spots if immediate repair isn’t possible.
Pros: Quick solution; protects against further damage temporarily.
Cons: Not a long-term fix; doesn’t restore original appearance.
Method | Best For | Cost Level | Skill Required |
Localized Repairs | Small isolated peels | Low | Beginner/Intermediate |
Full Panel Refinishing | Widespread damage | Medium/High | Intermediate/Professional |
Temporary Fixes | Short-term protection | Low | Beginner |
DIY vs Professional Repair
While minor repairs may seem manageable as DIY projects, professional refinishing is often recommended for extensive peeling: – DIY Repairs: Ideal for small areas where precision isn’t critical. Invest in quality tools like sandpaper, microfiber cloths, and automotive-grade cans of spray-on clear coat. – Professional Refinishing: Necessary when dealing with larger panels or widespread damage that requires expertise in color matching and application techniques.
Repairing your car’s clear coat not only restores its visual appeal but also protects it from further deterioration caused by UV rays, moisture, and contaminants. Whether you opt for minor patchwork or full refinishing depends largely on how badly your vehicle’s finish has been impacted by peeling issues.
When a Panel Needs to Be Sanded and Repainted
When clear coat damage progresses beyond minor peeling or flaking, sanding and repainting the affected panels may be necessary. This process is often required when the underlying paint layer has been exposed or compromised. Below, we’ll explore when sanding and repainting become essential, what the process entails, and why professional assistance is often recommended.
When Is Sanding and Repainting Necessary?
- Widespread Peeling: If more than one small area of the panel is peeling, simple spot repairs may not restore a seamless finish.
- Base Coat Exposure: Once the clear coat has completely peeled in an area, exposing the underlying paint (or even primer), sanding and repainting are generally unavoidable.
- Severe UV Damage: Sun exposure can accelerate clear coat breakdown. If large areas have become dull or discolored due to UV damage, refreshing both the base coat and clear coat becomes necessary.
- Deep Scratches or Chips: Deep scratches that penetrate both layers of paint need full refinishing as spot painting often leads to visible mismatches or uneven coverage.
The Process of Sanding and Repainting a Panel
- Assessment of Damage: The damaged panel is inspected to determine whether it can be repaired or if replacement might be more cost-effective (for example, for plastic bumpers).
- The peeling clear coat is sanded off entirely using fine-grit sandpaper.
- If necessary, technicians will also sand deeper layers to remove any imperfections in the base coat or primer.
- Bare metal or plastic surfaces are primed to ensure proper adhesion for new layers of paint.
- The original color-matched automotive paint is applied in thin coats until even coverage is achieved.
- A fresh layer of protective clear coat is sprayed over the base coat for durability and shine.
- Once dry, technicians buff the newly painted surface to blend it with surrounding panels seamlessly.
DIY vs Professional Sanding & Repainting
While DIY kits exist for minor touch-ups, sanding down an entire panel requires expertise and specialized tools such as HVLP spray guns, air compressors, and controlled environments to avoid dirt contamination.
Aspect | DIY Repairs | Professional Refinishing |
Equipment Needed | Limited tools required but challenging without professional-grade equipment | High-end tools in a clean workshop setting |
Cost | Cheaper upfront but risk costly mistakes | Higher cost but provides excellent results |
Skill Level Required | High skill required for even application | Work done by experienced technicians |
Durability | May not last as long due to improper technique | Long-lasting with correct prep work |
Why Trust Professionals for Larger Repairs?
Although attempting such work at home seems cost-effective initially, poorly-done repairs can lead to mismatched finishes or uneven surfaces that reduce your car’s resale value over time. Proper ventilation systems used by body shops also prevent problems such as paint bubbling caused by trapped moisture.
If your car’s panel requires sanding down multiple layers followed by complete repainting—particularly if metallic paints are involved—it’s advisable to involve professionals who understand automotive coatings’ complexities.
By taking early action on damaged areas before they worsen into costly repairs like this one—and pairing this with good maintenance habits—you can prolong your vehicle’s overall aesthetic appeal while avoiding unnecessary expenses in future upkeep steps!
When a Panel Needs to Be Sanded and Repainted
Clear coat damage is not just a cosmetic issue—it can lead to more significant problems if left unaddressed. When the peeling or flaking becomes extensive, simply touching up or applying a new clear coat may no longer be sufficient. In such cases, sanding down the panel and repainting it entirely may be necessary. Here’s what you need to know about this process.
When Is Sanding and Repainting Necessary?
There are specific conditions that indicate sanding and repainting are your best options:
– Widespread Peeling: If the peeling covers a large portion of the panel, spot repairs won’t blend seamlessly with the surrounding paint.
– Base Coat Exposed: Once the colored base coat or even bare metal underneath is visible, new clear coat alone won’t adhere properly without proper preparation.
– Deep Damage: Clear coat failure that extends into layers below typically requires removal of all compromised areas to ensure longevity of the repair.
Steps for Sanding and Repainting
- Wash and clean the area thoroughly to remove dirt, grease, or debris.
- Mask off surrounding areas to protect adjacent panels from overspray or sanding scratches.
- Use coarse-grit sandpaper (e.g., 320-grit) to remove the peeling clear coat entirely.
- Gradually move to finer grits (e.g., 600-grit) for smoothing out imperfections in the remaining paint layers.
- If bare metal or plastic is exposed, apply an automotive primer suitable for your vehicle’s material.
- Allow adequate drying time before proceeding further.
- Match your vehicle’s exact paint code for a seamless color match.
- Apply multiple thin coats of base paint, allowing each layer to dry before adding another.
- Spray several layers of high-quality automotive clear coat over the repaired area.
- Ensure even coverage and avoid excessive buildup that could lead to drips or uneven gloss levels.
- Once fully cured (often after 24–48 hours), wet sand lightly with very fine grit (e.g., 1500–2000 grit sandpaper) for an ultra-smooth finish.
- Polish using a buffer with appropriate compounds to restore shine and achieve professional-level results.
Professional vs DIY Approach
Factors | DIY Repair | Professional Refinishing |
Cost | Lower | Medium-to-high |
Equipment Quality | Basic tools required | Specialized equipment used |
Expertise Needed | High learning curve | Skillful execution assured |
Time Investment | Time-intensive | Typically faster turnaround |
If you lack experience with automotive painting techniques or access to quality tools like spray guns and compressors, professional refinishing might yield better results in terms of appearance and durability.
How Sanding Protects Your Vehicle Long-Term
Properly sanding down damaged areas ensures that new coatings bond effectively with underlying surfaces while removing contaminants like oxidized paint or rust spots that could worsen over time if left untreated. By addressing these issues comprehensively through repainting instead of temporary fixes, you safeguard your car’s bodywork against future corrosion while enhancing its resale value.
How to Prevent Future Clear Coat Damage
Protecting Your Car from Environmental Factors
Environmental exposure is one of the primary culprits of clear coat damage. Use these strategies to minimize its impact: – Avoid Prolonged Sun Exposure: UV rays are one of the leading causes of clear coat degradation. Whenever possible, park your car in a garage, under a carport, or in shaded areas. – Use a Car Cover: If covered parking isn’t an option, invest in a high-quality protective cover designed for your vehicle type. This helps shield your car from sunlight, bird droppings, tree sap, and acid rain. – Wash Regularly: Dirt, pollen, and grime can accumulate on the surface and lead to abrasions if left unchecked. Wash your car every 1–2 weeks using gentle automotive soap and a microfiber mitt.
Applying Protective Coatings
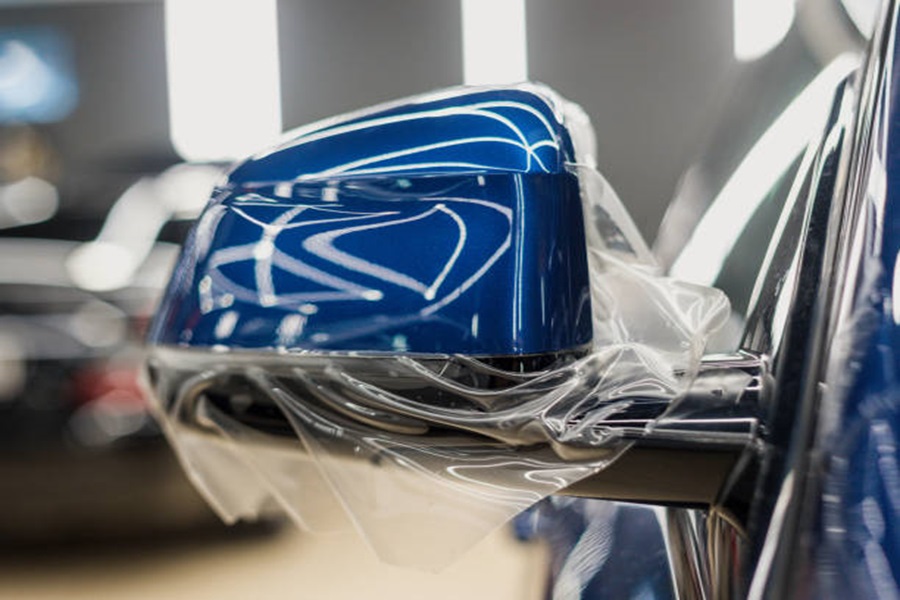
To add an extra layer of defense for your clear coat: – Waxing: Apply wax every two to three months. Wax acts as a sacrificial barrier between environmental contaminants and your vehicle’s paint. – Ceramic Coatings: Consider ceramic coating for long-term protection. These coatings bond with the surface and create an ultra-durable shield that resists wear from UV rays, chemicals, and debris. – Paint Protection Film (PPF): For high-impact areas like bumpers or door edges prone to chips or scratches, PPF offers excellent durability against mechanical damage.
Using Proper Cleaning Techniques
Improper washing or drying can lead to micro-scratches that weaken the clear coat over time: – Always use pH-balanced automotive soaps rather than household cleaners like dish soap. – Dry with clean microfiber towels instead of abrasive materials like old rags or paper towels. – Avoid automatic car washes with harsh bristles; opt for touchless systems whenever possible.
Adopt Better Driving Habits
Your driving habits also play a role in preserving your car’s finish: – Maintain a safe following distance on highways to reduce the risk of rock chips caused by debris kicked up by other vehicles. – Avoid driving through construction zones or gravel roads where loose stones can cause scratches.
Preventive Measure | Benefit |
Parking in shade/using cover | Reduces UV exposure |
Regular washing | Prevents dirt buildup that can scratch |
Waxing | Adds temporary layer of protection |
Ceramic coatings | Long-lasting defense against contaminants |
Paint Protection Film | Shields vulnerable areas from abrasions |
By adopting these preventive measures as part of regular maintenance routines, you can ensure that your vehicle’s clear coat remains intact and visually appealing longer. Taking care today will save costly repairs tomorrow while keeping your investment looking great on the road.
When to Have a Body Shop Evaluate the Paint Damage
Signs That a Visit to a Body Shop is Necessary
Some clear coat issues go beyond DIY fixes. Look for these indicators to decide if professional help is the best course of action:
– Large Areas of Peeling: If the peeling covers an extensive portion of your vehicle, simply sanding and recoating the damaged area may not provide a seamless finish.
– Exposed Base Coat or Metal: Once the base coat or metal underneath becomes visible, corrosion or further damage can occur if left untreated. A body shop can apply proper layers of primer, paint, and clear coat to restore protection.
– Severe Discoloration or Fading: Areas where UV damage has caused significant fading or discoloration may require refinishing by professionals who can color-match and blend paint properly.
– Multiple Panels Affected: If more than one panel (e.g., hood, roof, trunk) is peeling, addressing it yourself could become overwhelming and inconsistent in quality.
Benefits of Consulting a Professional Body Shop
While DIY repairs are tempting for their cost savings, relying on experts offers several advantages: 1. Expert Diagnosis: Professionals will assess whether your vehicle’s issue is limited to clear coat failure or if there’s deeper paint system damage. 2. Advanced Tools and Materials: Body shops have access to high-quality equipment like spray booths and specialized paints that ensure even application and long-lasting results. 3. Color Matching Expertise: Matching your car’s existing paint color requires precision—something professionals are trained for. 4. Warranty Options: Many reputable shops offer warranties on their work, giving you peace of mind.
What Happens During an Evaluation?
When you take your car in for an assessment at a body shop: – Technicians will inspect the affected areas closely under proper lighting conditions. – They may use tools like paint depth gauges to measure how much original material remains. – Based on their findings, they’ll recommend either spot repair techniques (if possible) or complete panel refinishing.
Cost vs. Value Considerations
While professional refinishing may appear costly upfront (pricing typically ranges from $150–$500 per panel depending on location), it often pays off due to: – Superior results that increase your car’s resale value. – Durability that prevents future issues like rust or additional peeling.
When Not To Delay Professional Repairs
It’s critical not to postpone visiting a body shop in certain situations: – If rust starts forming on exposed metal areas. – If peeling near edges spreads into adjacent panels. – If weather (e.g., rain or extreme heat) is worsening existing damage.
By addressing these issues with professional assistance promptly, you ensure your vehicle remains protected while maintaining its aesthetic appeal for years ahead.